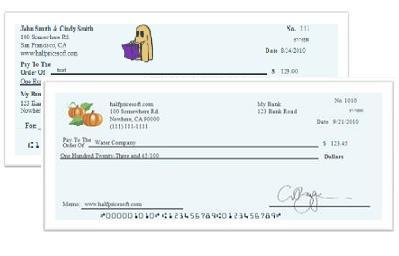
With ezCheckpersonal check writer, both Windows and mac customers can design and print professional checks easily in house. EzCheckPersonal allows customers to add logo to check. Here is the guide on how to print a Halloween style check.
Step 1: Start ezCheckPersonal software
If you have not installed ezCheckPersonal, you can download it from
http://www.halfpricesoft.com/check-printing-personal-software-download.asp
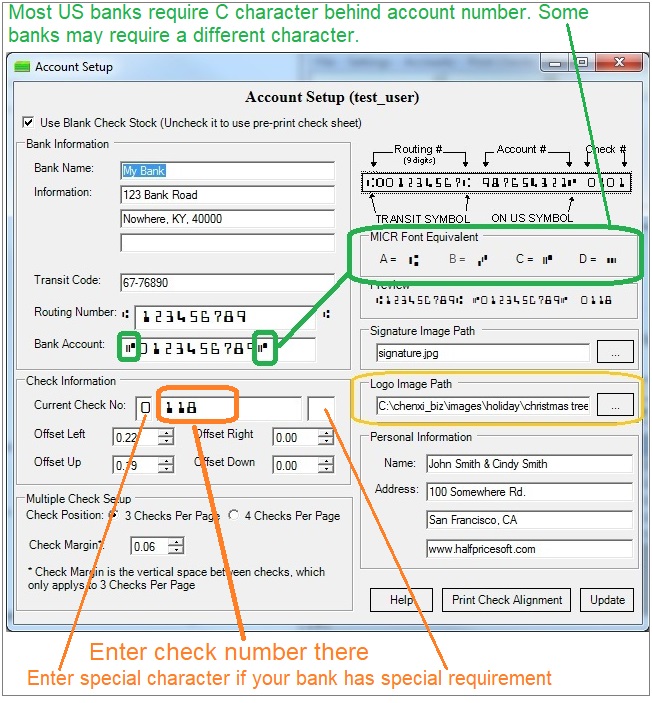
Step 2: Setup the bank account and add the logo image.
Click the top menu "Settings->Edit Current Account" to open the check setup page. Set up your check information and add your check logo file there.
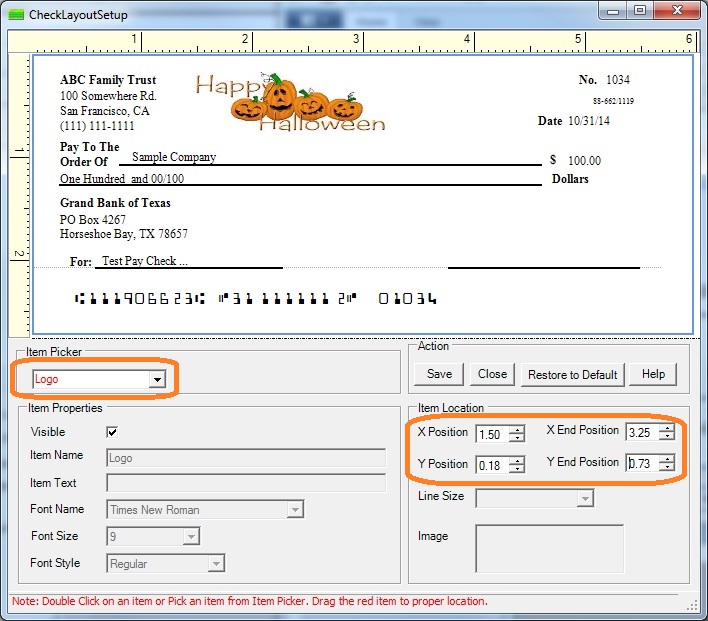
Step 3: Customize the check layout (optional)
Click the top menu "Settings->Check layout Setup" to open the check layout page. You can customize the layout of your check by changing the font size, logo position, logo size or add a new label.

To customize the logo, you need to select the logo from the item picker first. Then you can resize it or drag/drop the logo to a new position. If you are satisfied with the effect, you can save your change.
Step 4: Add a new check
Go back to the main page. Click the New button to add a check. Select this check from the check list and click the Print button to print your check.
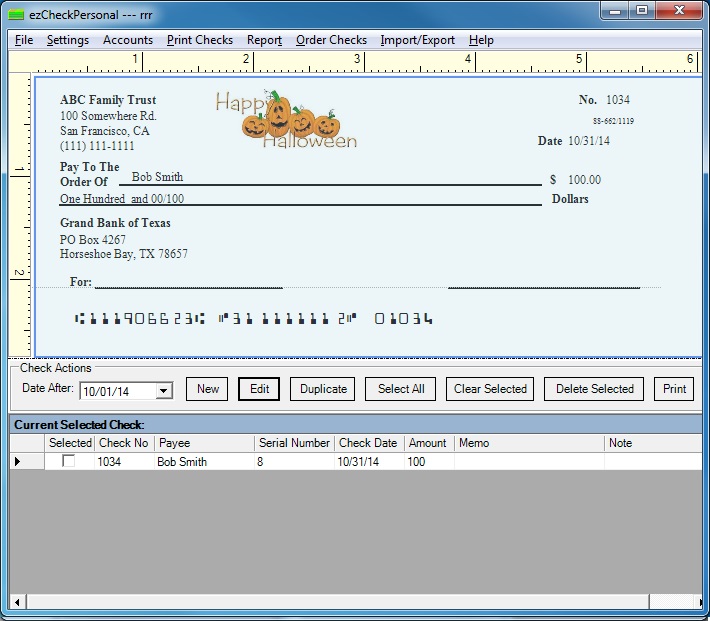

Step 5: Print Check
Select the check(s) from check list and click the PRINT button (see image in step 4). Select your target printer, you will see the pre-preview screen. If you are satisfied at your checks, click the PRINTER icon to print the checks.

Related article:
How to print blank pre-printed checks
http://www.halfpricesoft.com/business-blog/post/2012/02/09/How-to-Print-Pre-printed-Personal-Blank-Bank-Checks.aspx
How to customize Check Layout
http://www.halfpricesoft.com/business-blog/post/2011/09/14/How-to-customize-bank-check-with-ezCheckPersonal.aspx


