EzCheckPersonal allows user to add logo to check. User can also customize the logo size and location easily.
Step 1: Start ezCheckPersonal
If you have not installed ezCheckPersonal, you can download it from
http://www.halfpricesoft.com/check-printing-personal-software-download.asp
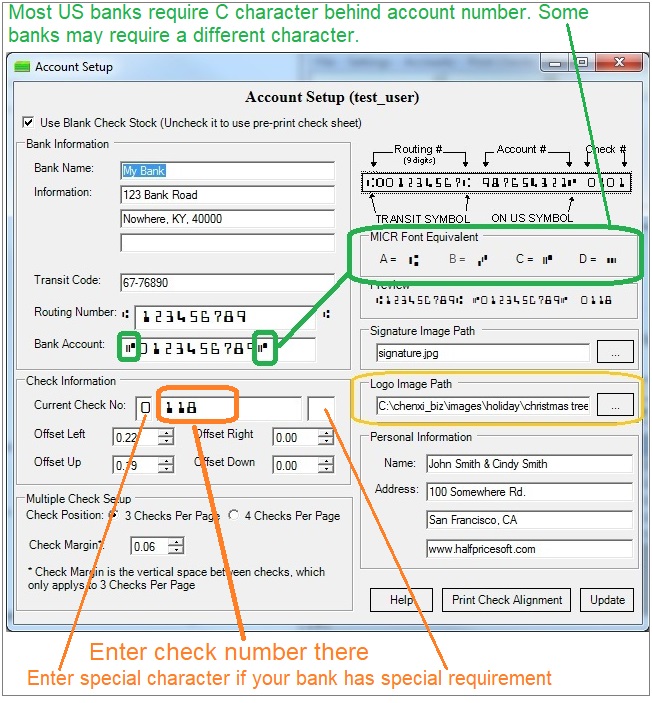
Step 2: Setup your bank account and add the logo image.
Click the top menu "Settings->Edit Current Account" to open the check setup page. Set up your check information and add your check logo file there.
Step 3: Customize the check layout (optional)
Click the top menu "Settings->Check layout Setup" to open the check layout page. You can customize the layout of your check by changing the font size, logo position, logo size or add a new label.

To customize the logo, you need to select the logo from the item picker first. Then you can resize it or drag/drop the logo to a new position. If you are satisfied with the effect, you can save your change.

Step 4: Add a new check
Go back to the main page. Click the New button to add a check. Select this check from the check list and click the Print button to print your check.
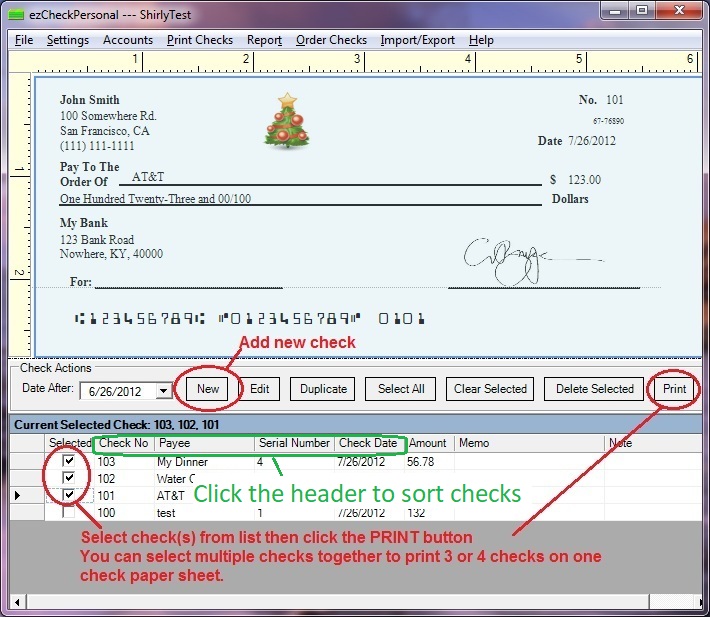

Step 5: Print Check
Select the check(s) from check list and click the PRINT button (see image in step 4). Select your target printer, you will see the pre-preview screen. If you are satisfied at your checks, click the PRINTER icon to print the checks.

Related article:
How to print blank pre-printed checks
http://www.halfpricesoft.com/business-blog/post/2012/02/09/How-to-Print-Pre-printed-Personal-Blank-Bank-Checks.aspx
How to customize Check Layout
http://www.halfpricesoft.com/business-blog/post/2011/09/14/How-to-customize-bank-check-with-ezCheckPersonal.aspx


