Filing Corrections for 1099-NEC Forms in ezW2
If you need to correct previously submitted 1099-NEC forms, follow the steps in this article to file corrections using ezW2.
Step 4.1: Update Company Contact Information
Before filing corrections, ensure your company contact information is up to date. This information will be included on the 1096 form that accompanies your correction submission.
- Start ezW2 and click the top menu "Current company" then "Company".
- Navigate to the "1096 contact" section.
- Add all required contact information, including:
- Company name
- Address
- Phone number
- Other required contact details
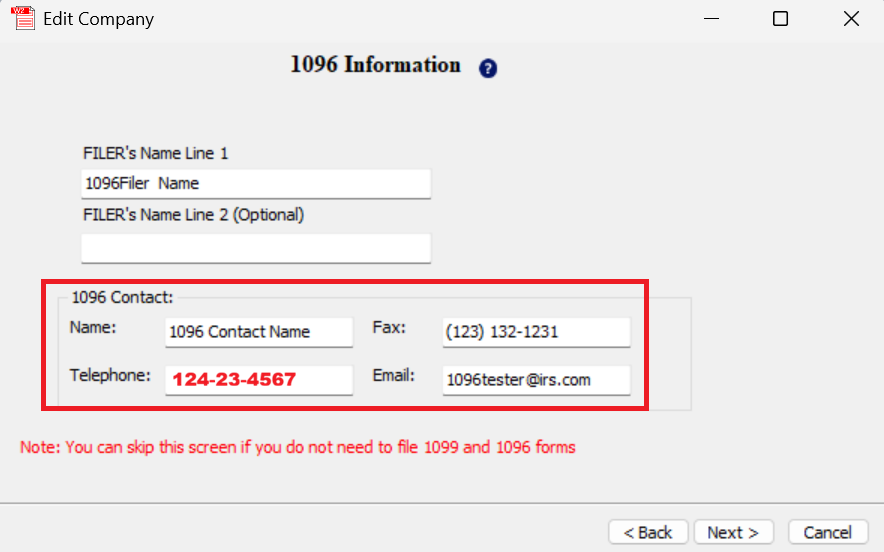
The contact information you enter in the "1096 contact" section will appear on the 1096 form that is automatically included with your correction submission.
Step 4.2: Correct the 1099-NEC Form Data
Before submitting a correction, you must first correct the actual form data in ezW2:
- Select Form 1099 in the ezW2 application to view your 1099-NEC forms.
- Locate the form that needs to be corrected in the 1099-NEC list.
- Double-click the form or select it and click Edit to open the form for editing.
- Make the necessary corrections to the form data (recipient information, amounts, etc.).
- Select Save to save your changes. A Database updated message will appear when the form has been saved successfully.
You must correct the form data in ezW2 before proceeding to e-file. The correction submission will include the corrected data from the forms you've updated.
Step 4.3: Verify Contact Information on 1099 Forms
After updating your contact information and correcting the form data, verify that everything appears correctly:
- Print a 1099 form to preview it.
- Verify that:
- The payer phone number and other contact information are visible and correct
- The corrected form data is accurate
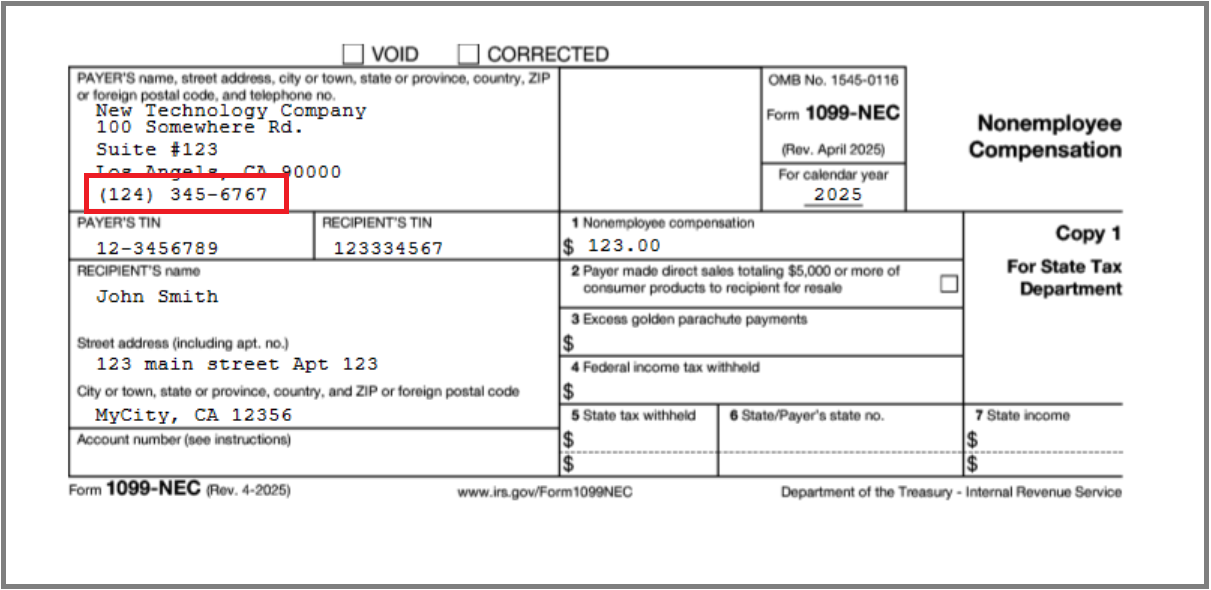
Printing a test form before submitting corrections helps ensure all information is accurate and will prevent additional correction submissions.
Step 4.4: Open the 1099 E-File Screen
To begin the correction filing process:
- Select Direct 1099 E-File(IRIS) in the top section of the ezW2 application.
- The 1099 e-file screen will open, displaying all available 1099 forms.
Step 4.5: Select Forms and Configure Correction Settings
On the 1099 e-file screen, configure your correction submission:
-
Select all forms you need to file - Carefully review the list and select only the forms that require corrections.
-
Check the option "Is Corrected file for submission" - This tells the system that you are filing a correction rather than an original submission.
-
Enter the Original Receipt ID - This is the unique identifier you received when you originally submitted the forms. You can find this in your eFile Management Dashboard.
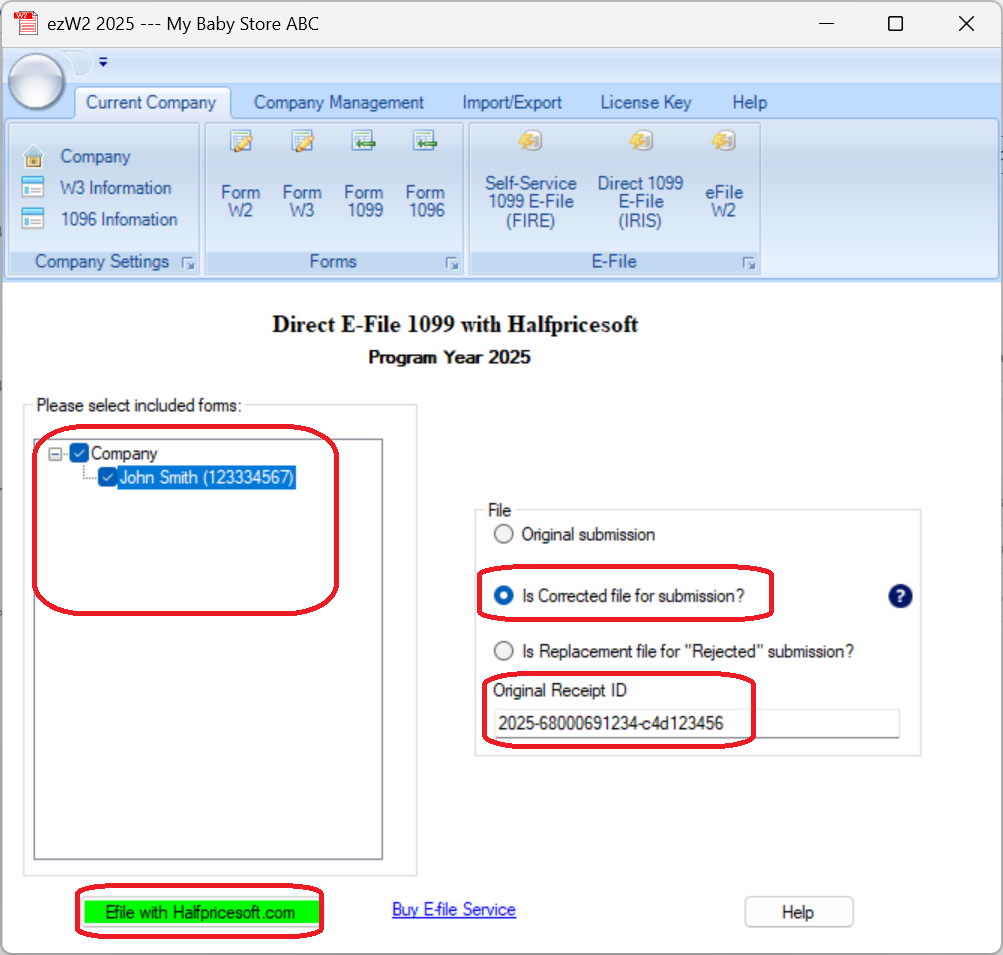
The Original Receipt ID is required for correction submissions. If you don't have your Original Receipt ID, you can find it in your eFile Management Dashboard under the detailed view of your original submission.
Step 4.6: Submit Your Correction
After configuring your correction settings:
- Click "Efile With halfpricesoft.com" to proceed with the submission.
The submission process will be the same as an original submission. You will need to:
- Log in with your Halfpricesoft account credentials
- Upload the correction file
- Confirm the submission
After successful upload, you will see a confirmation message. Continue to the Monitoring Submissions Status page to track the status of your correction submission.
Correction submissions go through the same review process as original submissions. Processing can take up to 2 business days during the Internal Review stage. Be sure to submit corrections well before any deadlines.
When you submit corrected 1099-NEC forms, Halfpricesoft will automatically include the required 1096 form with your correction submission, using the contact information you configured in Step 4.1.