ezACH software makes it easy to generate the NACHA ACH (Automated Clearing House) file for electronic funds transfers. Here is the step by step guide on how to move ezACH from one machine to another machine with database. User can also use this guide to backup or retore database file.
From $295
Generate ACH Files for Direct Deposit In-House
ezACH: Trusted By Thousands.
Generate ACH files for direct deposit paychecks
Generate ACH files for vendor payments
Generate ACH files for government payments
Unlimited accounts. Unlimited transactions.
For both federal and states.
Try free DEMO today. No obligation. No credit card required. No risk.
ezACH is compatible with Windows 11, 10, 8.1, 8, 7, and other Windows system, 32-bit or 64-bit.
Option 1: If your current computer is still running, you can use ezACH database backup and restore feature
- If you will use ezACH on both old and new computer, you must purchase the 2nd license key. You can contact us to upgrade your single user version to 2-user version
- If you will use ezACH on the new computer only and you have removed ezACH from the old computer, please search your email account for the license key by "[email protected]". We always send the license key from the same account.
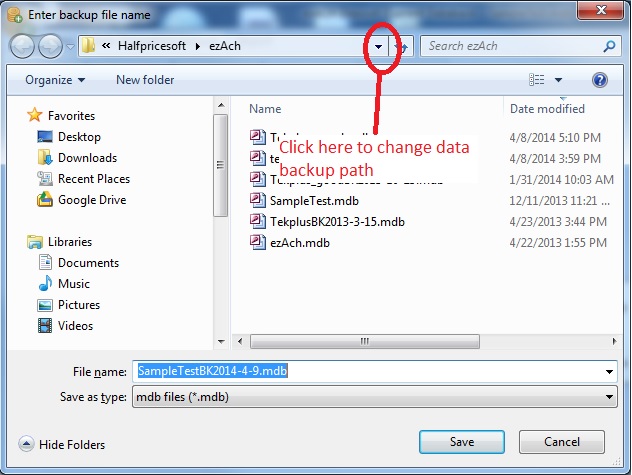
Step 1.3: Back up the database file to the USB disk
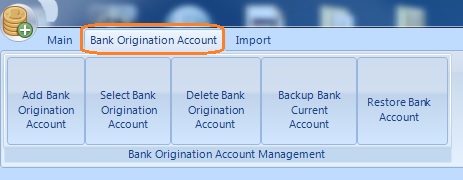
Start ezACH on the old machine, and click the top menu "Bank Origination Account", then click "Backup Bank Current Account" to save the current database file to your USB disk.
Step 1.4: Copy the database file from the USB disk to the data folder on your new machine.
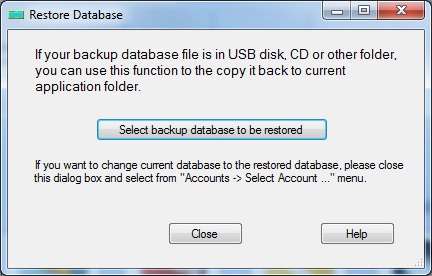
Start ezACH on the new machine, and click the top menu "Bank Origination Account", then click "Restore Bank Account" to copy the database file from USB disk to new machine.
Step 1.5: Switch Current Account
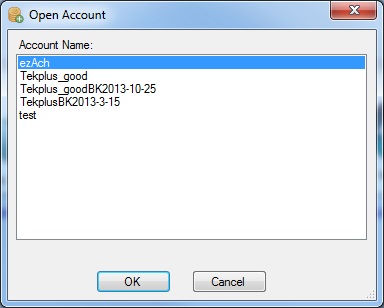
Start ezACH on the new machine, and click the top menu "Bank Origination Account", then click sub menu "Select Bank Origination Account".
Option 2: If you have multiple accounts or if your computer is crashed, you can move data manually.
- If you will use ezACH on both old and new computer, you must purchase the 2nd license key. You can contact us to upgrade your single user version to 2-user version
- If you will use ezACH on the new computer only and you have removed ezACH from the old computer, please search your email account for the license key by "[email protected]". We always send the license key from the same account.
Step 2.3: Copy the database file from the old computer to the USB disk
The database file is .mdb file
The default data folder on the old computer is:
C:\Users\Public\Documents\Halfpricesoft\ezAch
Step 2.4: Copy the database file from the USB disk to the data folder on your new machine.
The default data folder on the new computer is:
C:\Users\Public\Documents\Halfpricesoft\ezAch
Step 2.5: Switch Current Account
Start ezACH on the new machine, and click the top menu "Bank Origination Account", then click sub menu "Select Bank Origination Account".