Setting Up Your Employee Profile
After your employer sets up their business on ezPaycheck Online, you need to complete your employee profile so you can access previous pay stubs and receive direct deposit payments. Complete the following four steps to finish setup.
Step 1: Set Up Your Account
The first step in this process is create an account with Halfpricesoft's online portal, and then join your company .
Go to the page to create your account for Halfpricesoft.com.
Once your account is set up, log in to ezPaycheck Online. This will be the view you see:
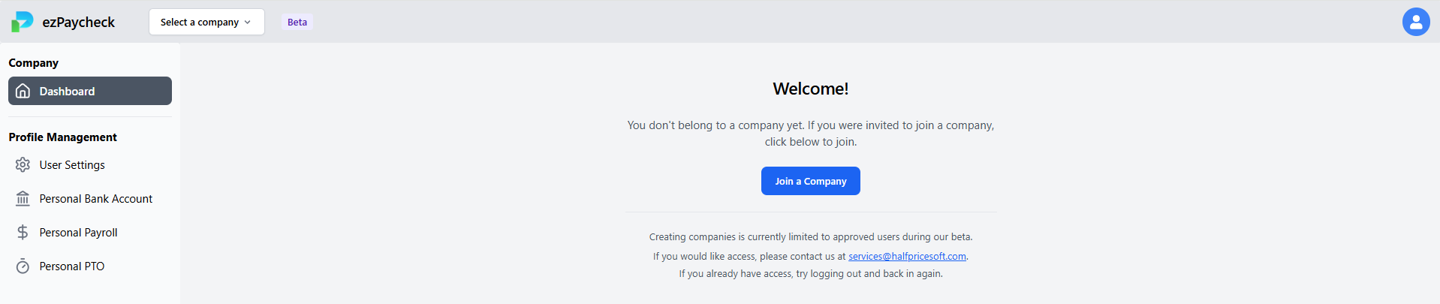
Once signed in, select Join Company. You will need to provide your first and last name and Social Security number (SSN). The SSN you enter must match the one your employer used when creating your profile; otherwise, you will not be able to join the company.
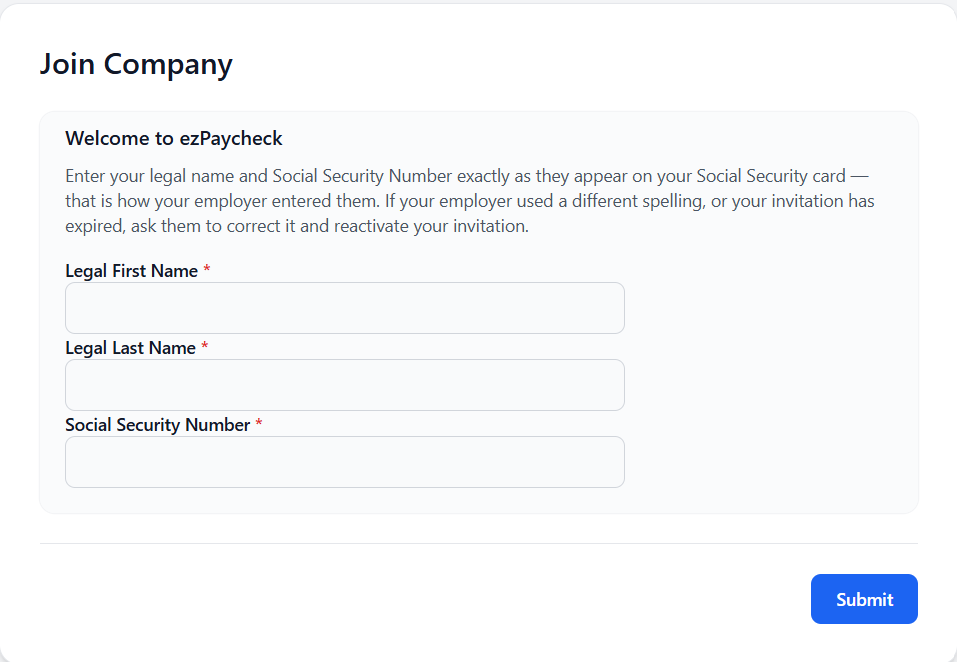
Once all 3 fields have been populated with the correct information, select Submit.
The access code is valid for one week after it is delivered to your email. If the code expires, contact your employer and ask them to resend the invite.
Step 2: Set Up Your Personal Profile
Add your personal information to your profile. On the dashboard, select Set Up Now to begin.
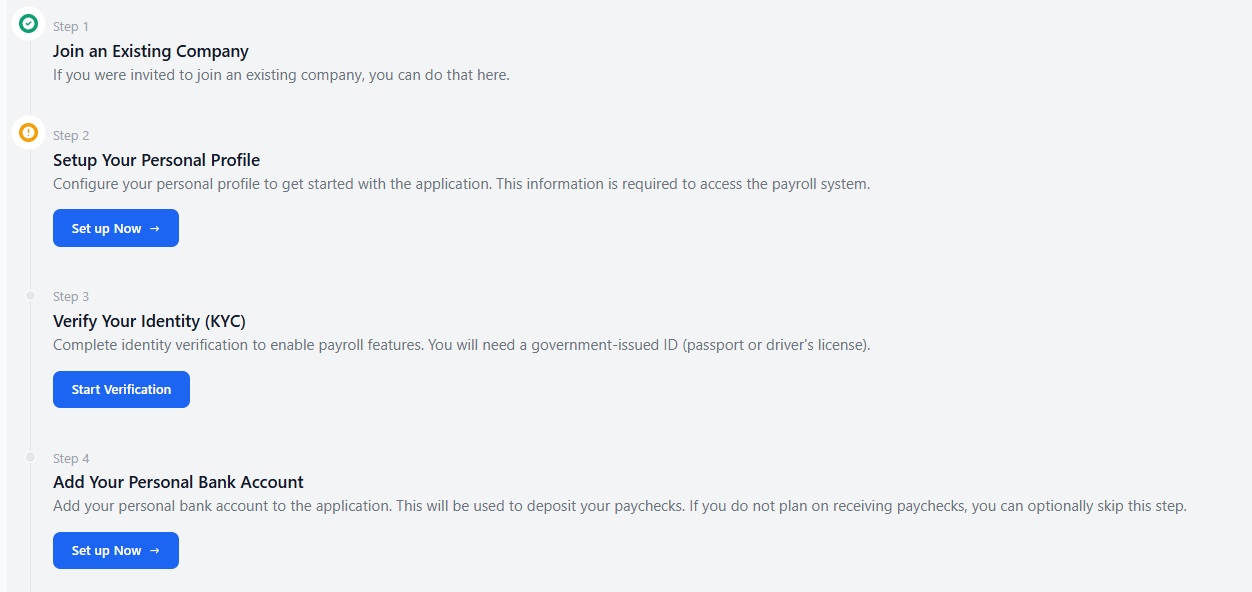
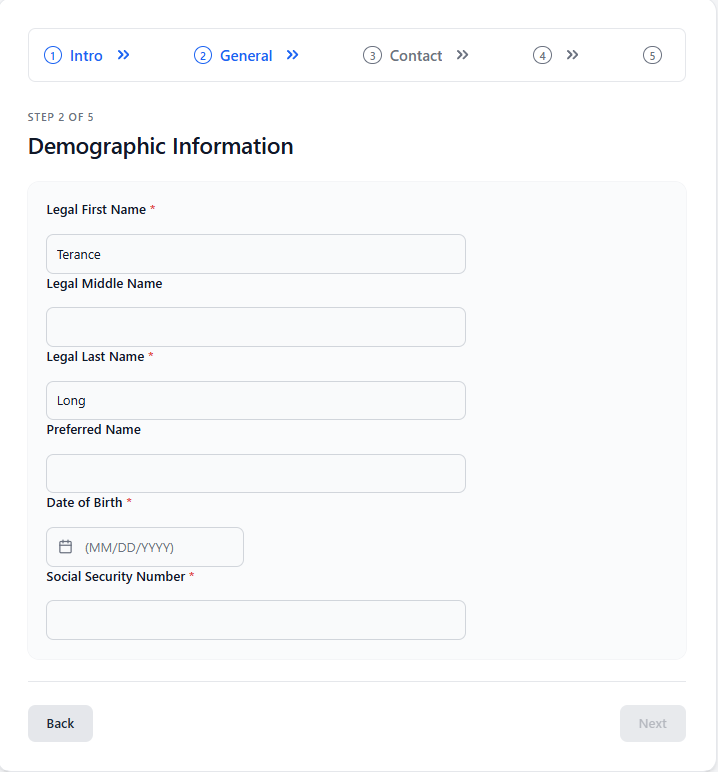
Select Setup Your Personal Profile. Then enter your name, date of birth, and Social Security number. Select Next once all fields have been populated.
Add your contact information to your profile. Confirm that the address is correct and add your phone number. Once all required fields have been populated, select Next.
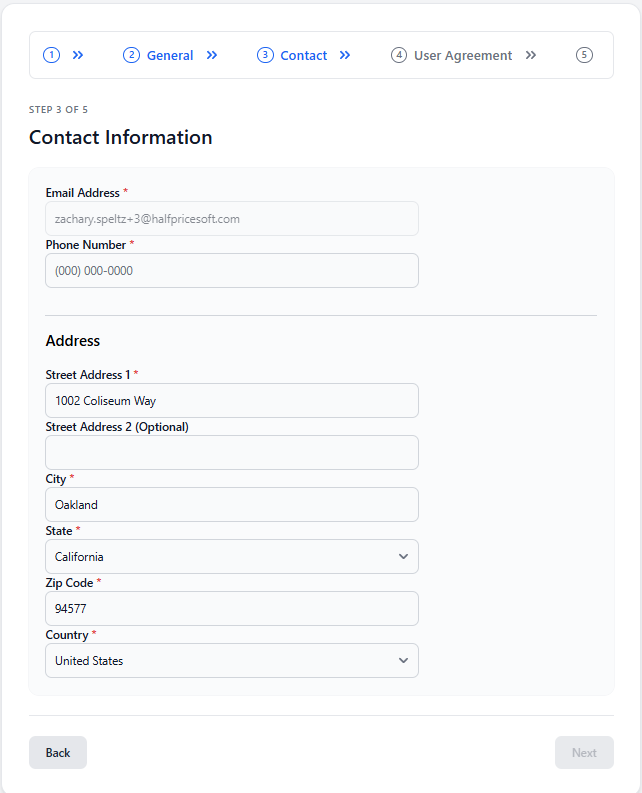
Select the checkbox confirming that you have read and agree to the user agreement. Select Next to continue. On the next page, review the information you entered in the previous steps. If everything looks correct, select Submit to complete your personal profile.
If you ever need to edit any of the information you added to your profile, you can do so from the User Profile page on the Dashboard.
Step 3: Verify Your Identity (KYC)
Verify your identity to continue setting up your profile. From the dashboard, select Start Verification.
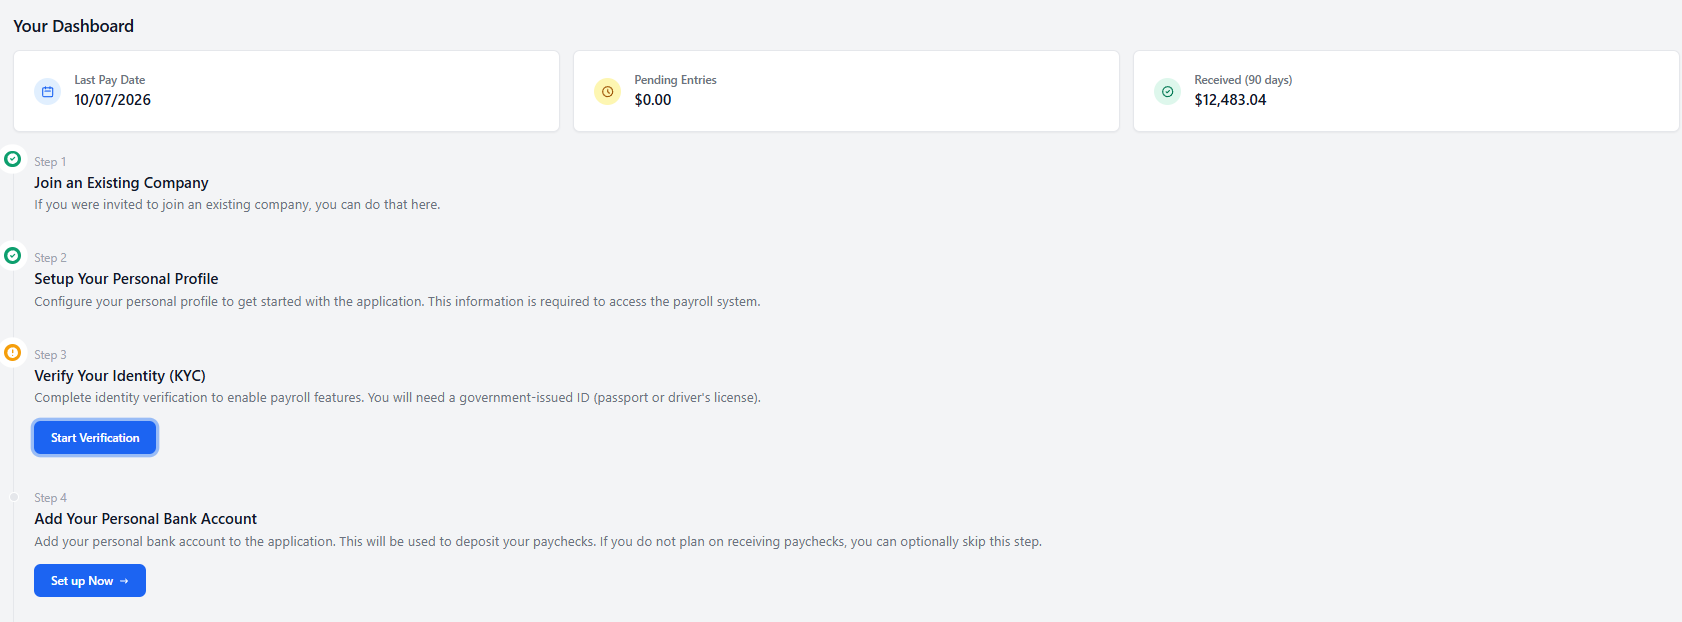
Read the overview page, then select Next when you are ready to proceed. Select whether you are uploading a passport or driver's license. Approved file types are JPG, PNG, and PDF, and the maximum file size is 10 MB. Once you select the document type and upload your image, select Next.
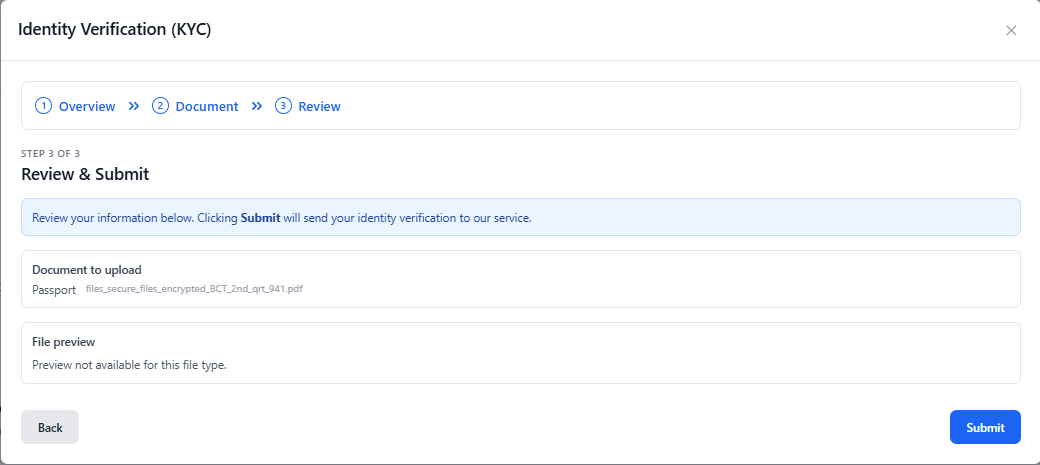
Review what is being uploaded on the next page. If everything looks correct, select Submit to complete this step.
Step 4: Add Your Personal Bank Account
The final step is adding a bank account for direct deposit. From the dashboard, select Set Up Now to begin.
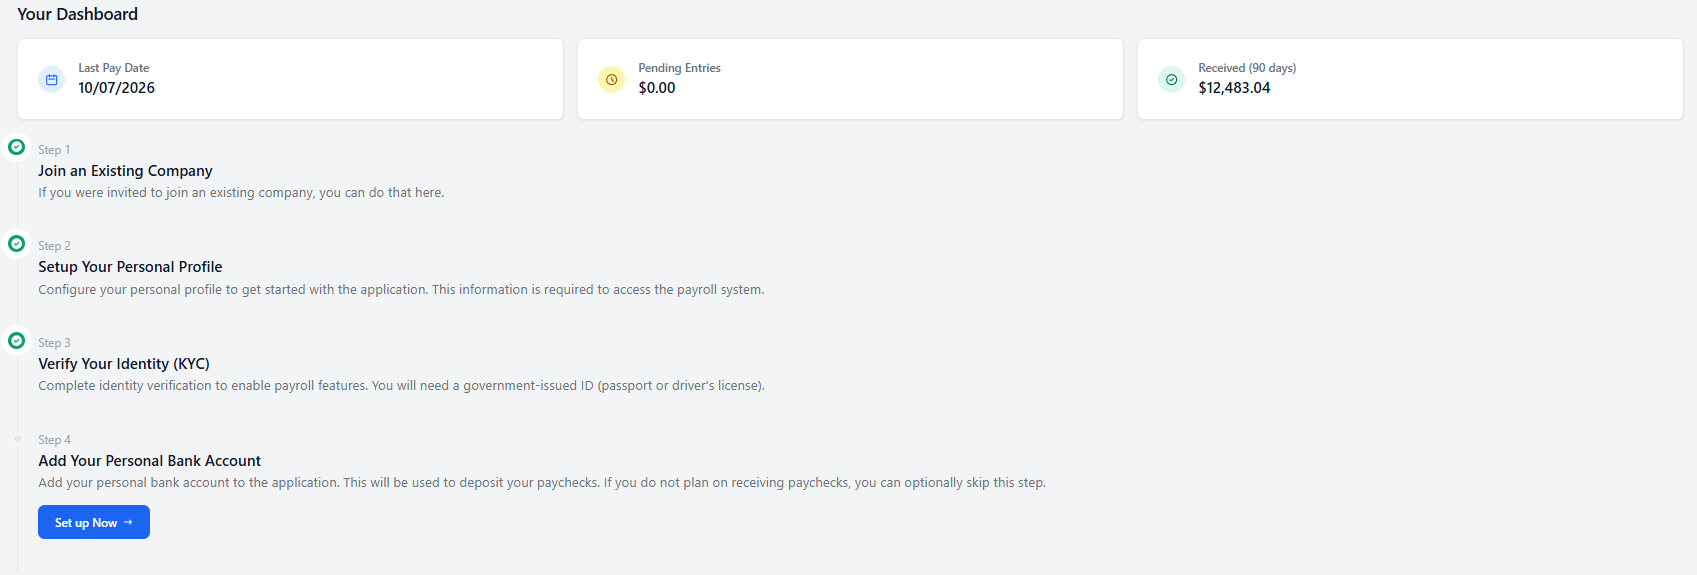
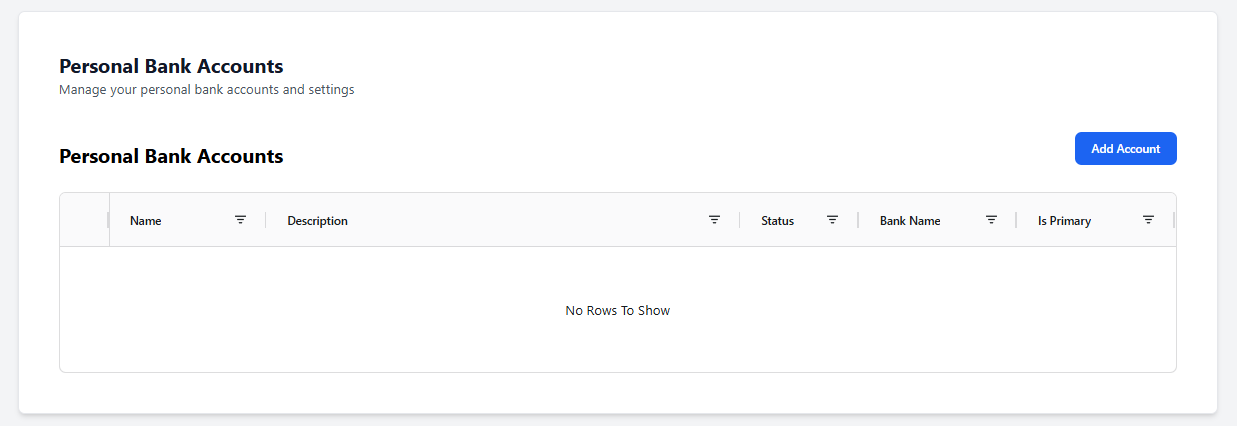
You will be redirected to a new page. Select the Add Account button.
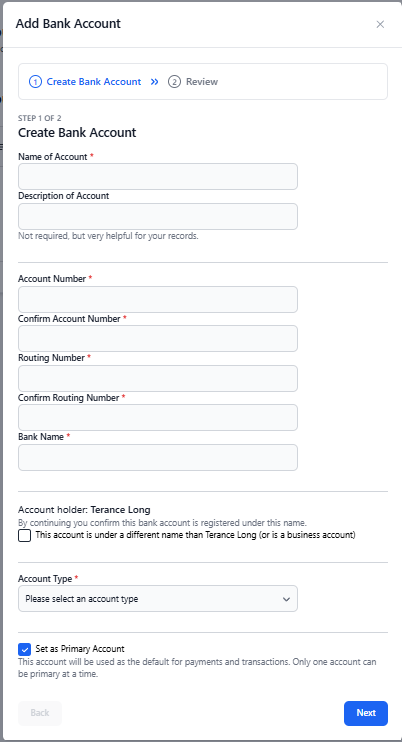
Add the following information for your bank account and select Next once you have filled out all of the required information.
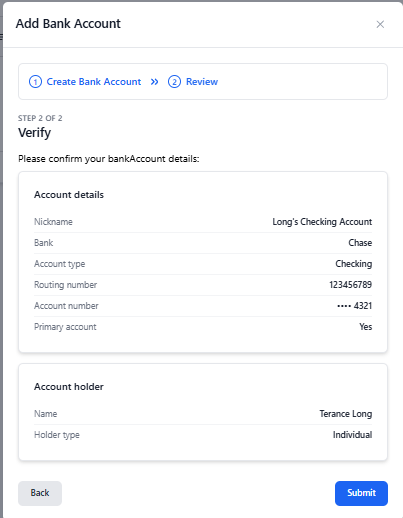
Review all of the information you entered. If everything is correct, select Submit.
If you need to add a bank account or edit an existing one, go to your Personal Bank Accounts page.