Halfpricesoft Halfpricesoft

Learn how to run our accounting and tax software on your Mac using VMware Fusion, Parallels Desktop, or Boot Camp.

How to Run Windows on Mac (2026)

Overview

Broadcom now offers VMware Fusion Pro 13 for free for all use. This is the most reliable way to run Windows applications (like ezW2 or ezAccounting) on a Mac without restarting your computer.

Prerequisites:

  • A Mac running macOS Big Sur 11.0 or later.
  • Works on both Intel Macs and Apple Silicon (M1/M2/M3).
  • About 30GB of free disk space.

Step 1: Download VMware Fusion from Broadcom

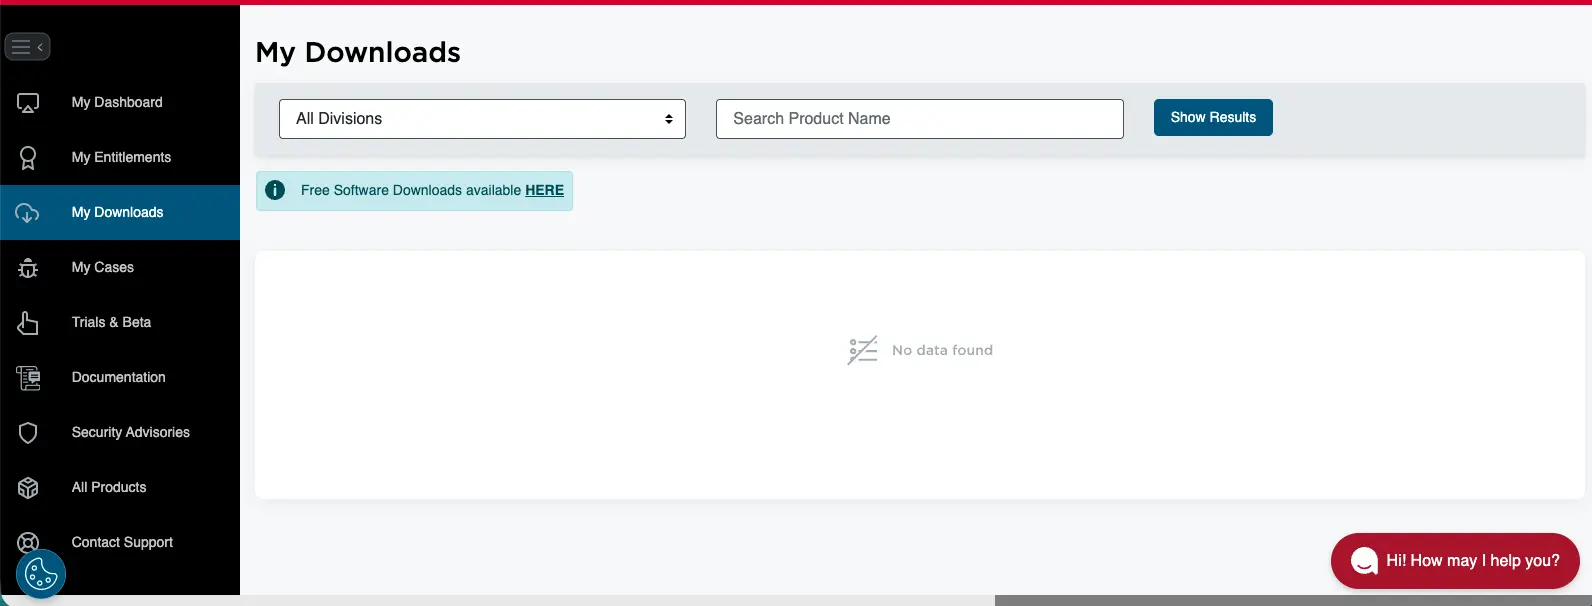
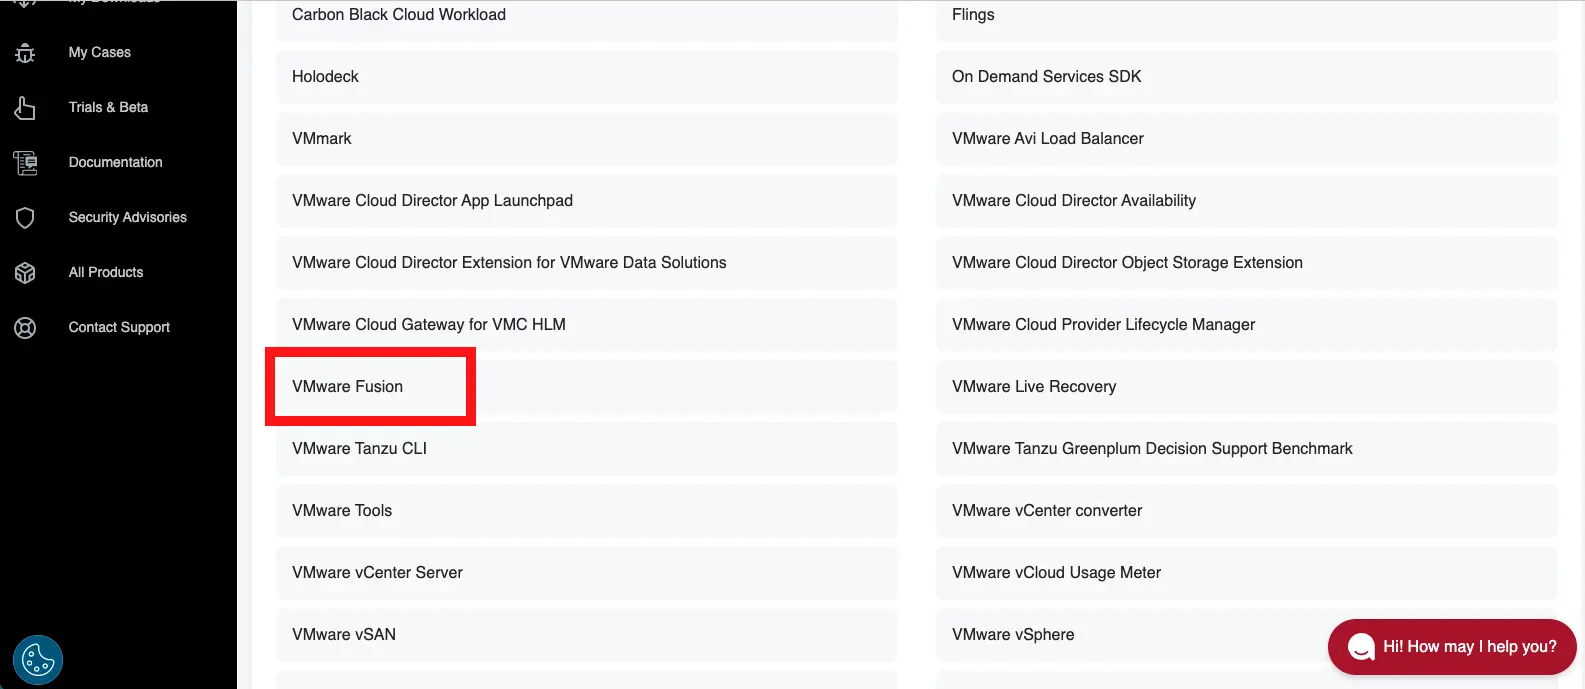
The download process has changed since Broadcom acquired VMware. You must register for a support account to access the download. The following steps will be updated as the download process changes.

  1. Go to the Broadcom Support Portal.
  2. Click Register in the top right corner to create a generic Broadcom account.
  3. Once logged in, look for "My Downloads" in the left sidebar. Once selected, you should see a link leading to "Free Software Downloads". Broadcom my products page where downloads are
  4. Scroll down and look for the option "VMWare Fusion" Broadcom download vmware fusion in list of products
  5. Select the latest release of VMWare Fusion that is compatible with your Mac. For the time of writing, the latest release is 25H2. Broadcom download vmware fusion 25h2 in list of products
  6. When you get to the download page, you must click on the terms and conditions link before you can agree to the terms and conditions. After doing so, you can click the download button. They may ask you for more information before allowing you to download.
  7. After download the dmg file, you can open it and follow the instructions to install VMware Fusion. You may want to move the actual VMFusion application to your Applications folder for easier access. This can be done by dragging the VMFusion application to the Applications folder. Drag VMFusion from the dmg to the Applications folder
Tip: If the portal is difficult to navigate or the page has changed, try searching their website using the search bar at the top of the page. Additionally, Broadcom has a support portal chat you can connect with for more installation help. Click here for a Broadcomm download guide

Step 2: Download Windows 11 via VMware

You do not need to hunt for a Windows ISO file manually. VMware Fusion 13.5+ includes a built-in tool to fetch the correct version for your Mac (ARM64 for M1/M2/M3 or x64 for Intel).

  1. Open VMware Fusion.
  2. Click the + icon in the menu and select New...
  3. In the installation method window, select "Get Windows from Microsoft".
  4. Choose "Windows 11", select your language, and click Download.
  5. VMWare Fusion download windows 11 step

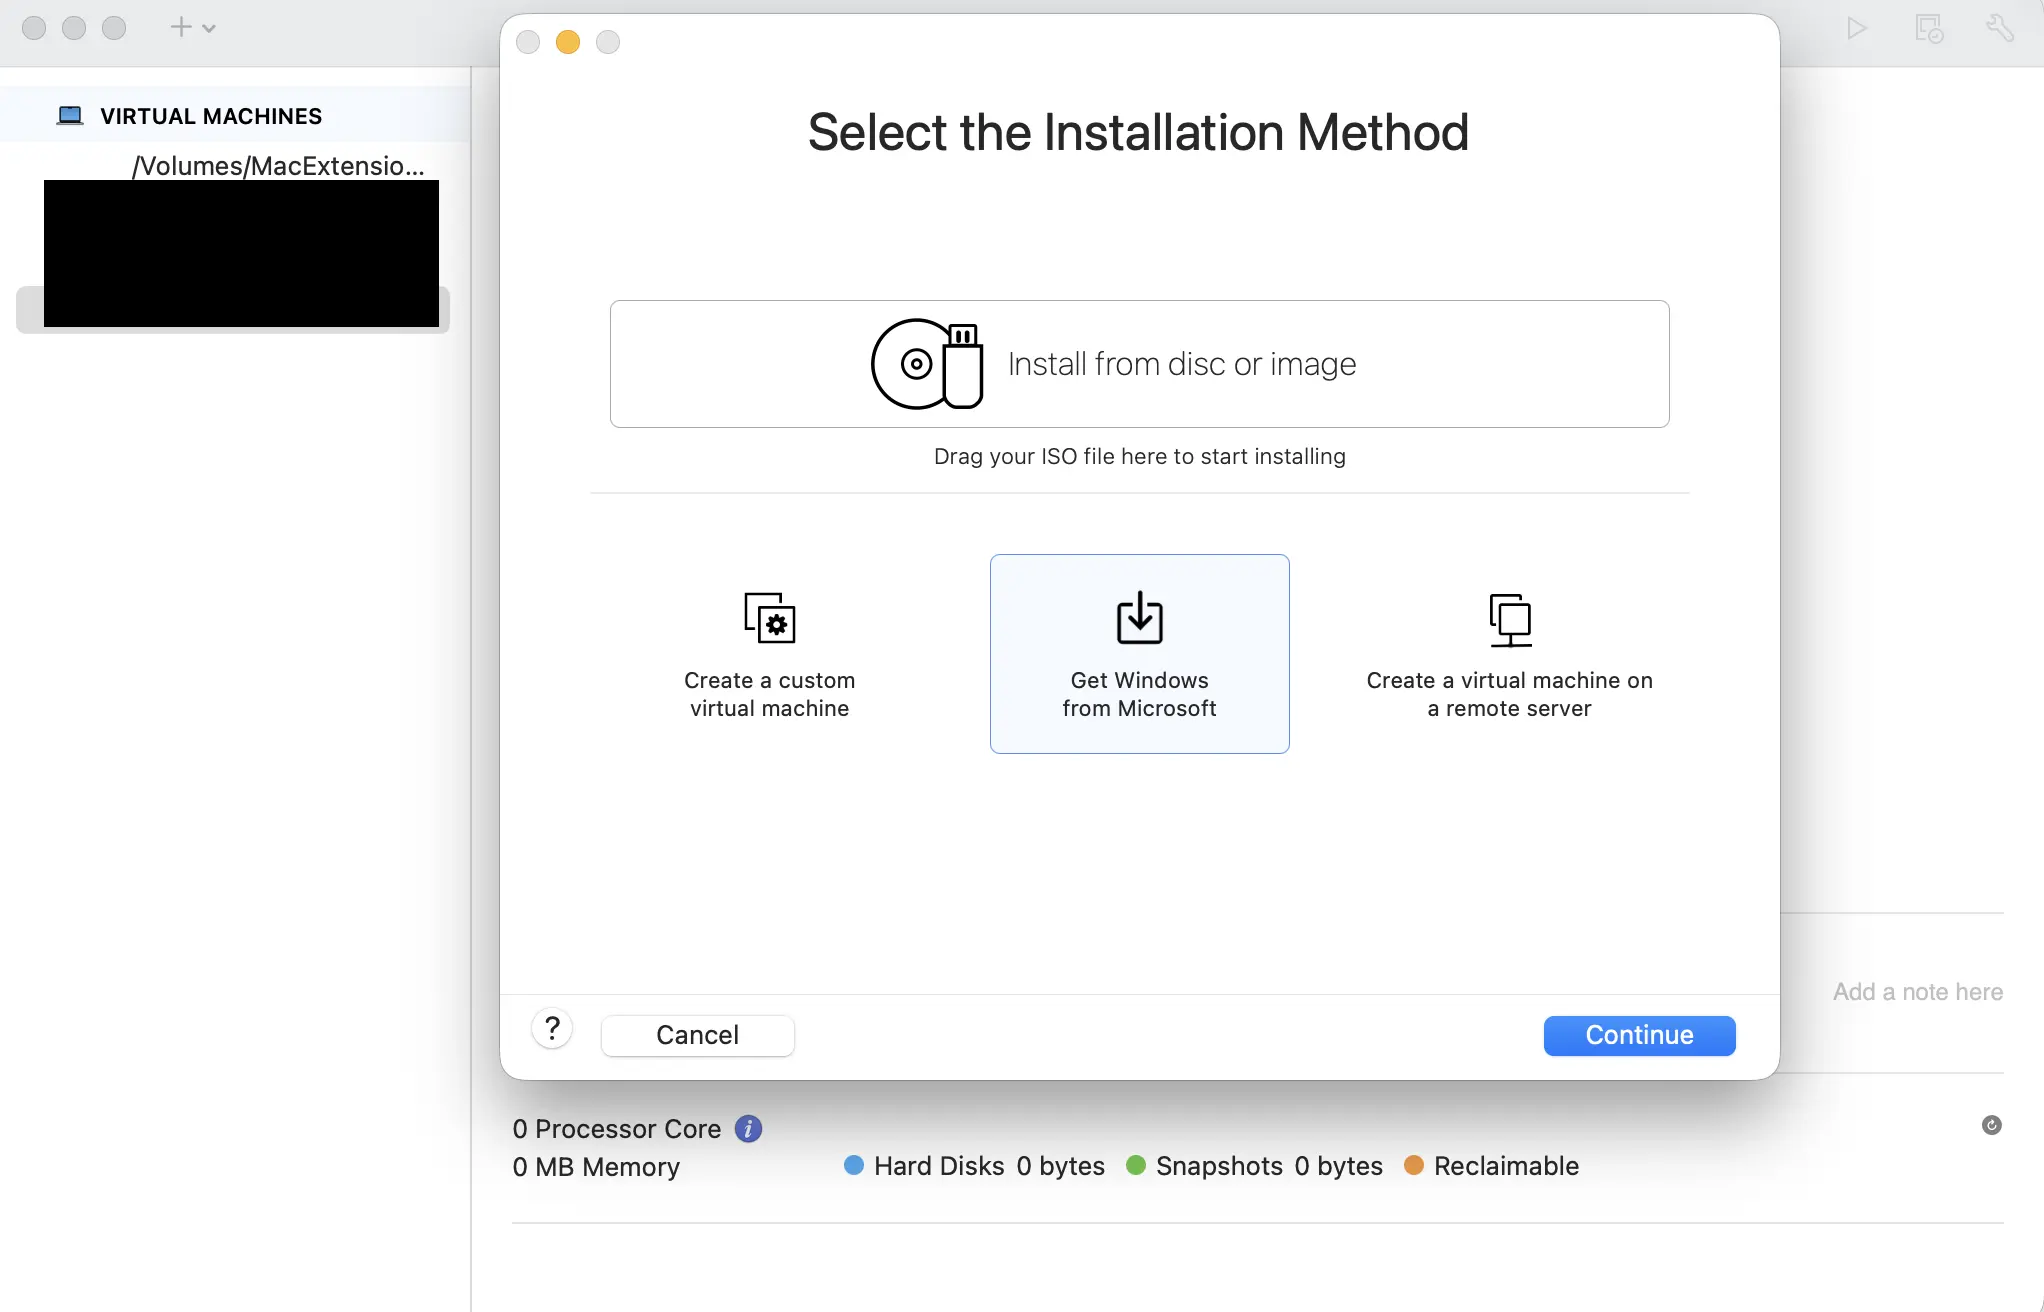
This will download the official Windows 11 ISO directly to your Mac. Follow the remaining steps to install Windows 11.

Step 3: Encryption and TPM Setup

Windows 11 requires a "Trusted Platform Module" (TPM). VMware simulates this using encryption.

  • After the ISO downloads, click Continue.
  • When prompted, choose "Fast Encryption" (this provides the necessary security for Windows 11 without slowing down performance).
  • Set a password: You must create a password for the Virtual Machine. Write this down. If you lose this password, you cannot recover the data inside the VM.

Step 4: Install Windows

The Virtual Machine will boot up. Follow the standard Windows setup screens:

  1. Select Language and Keyboard.
  2. Click Install Now.
  3. Product Key: Click "I don't have a product key" at the bottom (you can run Windows unactivated for free, or buy a license later from Microsoft).
  4. Select Windows 11 Pro.
  5. Select Custom Install and choose the single Drive 0 available.

Step 5: Install VMware Tools (Fix No Internet)

Important: When Windows 11 first loads, it will likely have no internet connection and a low-quality display. This is normal. You must install the drivers manually to fix this.

How to install the drivers:

  1. In the Mac menu bar (top of screen), click Virtual Machine > Install VMware Tools.
    (If it says "Reinstall VMware Tools", click that instead).
  2. Inside the Windows VM, open the Start Menu and type "PowerShell".
  3. Right-click Windows PowerShell and choose Run as Administrator.
    (Click "Yes" if asked to allow changes).
  4. In the blue PowerShell window, type the following command and press Enter:
    Set-ExecutionPolicy RemoteSigned
    (Type A and press Enter to confirm).
  5. Open File Explorer, go to the DVD Drive (D:).
  6. Find the file named setup.ps1, right-click it, and select Run with PowerShell.

A terminal window will pop up and install graphics and network drivers. Once it closes automatically, restart Windows. You will now have full internet access and a high-resolution display.

Ready to install software? Now that Windows is running, open the Edge browser inside your Virtual Machine, visit our site, and download ezW2 or ezAccounting just like you would on a regular PC.

Alternative: Parallels Desktop

While VMware Fusion is completely free, Parallels Desktop is another excellent option for running Windows on your Mac. Although it requires a paid subscription (starting at $99.99/year), Parallels Desktop offers:

  • Simplified installation process with automatic Windows 11 setup
  • Seamless integration between macOS and Windows applications
  • Better performance for graphics-intensive applications and games
  • Official Microsoft authorization for Windows 11 on Apple Silicon Macs
  • 14-day free trial to test before purchasing

If you prefer a more user-friendly experience and don't mind paying for the convenience, Parallels Desktop is a viable alternative to VMware Fusion. Both solutions will allow you to run Windows applications like ezW2 and ezAccounting on your Mac.

Alternative: Boot Camp (Intel Macs Only)

Important: Boot Camp only works on Intel-based Macs. Apple Silicon Macs (M1, M2, M3, etc.) do not support Boot Camp. If you have an Apple Silicon Mac, please use VMware Fusion or Parallels Desktop instead.

Boot Camp is Apple's built-in utility that allows you to install Windows natively on your Mac, giving you the option to boot directly into Windows or macOS. This method provides the best performance since Windows runs directly on the hardware, but requires you to restart your computer to switch between operating systems.

Advantages of Boot Camp:

  • Full native performance - Windows runs directly on your Mac's hardware
  • No virtualization overhead
  • Free - included with macOS
  • Best option for resource-intensive applications

Disadvantages of Boot Camp:

  • Requires restarting your Mac to switch between macOS and Windows
  • Only available on Intel-based Macs
  • Requires partitioning your hard drive
  • Cannot run macOS and Windows applications simultaneously

To set up Boot Camp, you'll need:

  • An Intel-based Mac
  • A Windows 10 or Windows 11 ISO file
  • At least 64GB of free disk space (128GB recommended)
  • A USB drive (16GB or larger) for the Windows installer

You can find detailed Boot Camp setup instructions in Apple's support documentation or by opening Boot Camp Assistant (located in Applications > Utilities) on your Intel Mac.