ezCheckPrinting is the easy-to-use, flexible and affordable check writer for small businesses, non-profits and accountants With ezCheckPrinting, you can print checks with signature and logo easily.
If you do not a signature image, you can follow this guide to create one yourself.
How to create a digital signature
Followings are the steps to add a signature to your check.
Step 1: Start ezCheckPrinting
If you have not installed ezCheckPrinting, you can download it from
http://www.halfpricesoft.com/check_printing_software_download.asp
Step 2: Open check setup screen
Click the top menu "Settings->check setup" to open the check setup page. Set up your check information and add your company signature file there.

Step 3: Customize the check layout (Optional)
(If you like current layout, you can skip this step.)
Click the top menu "Settings->Check layout" to open the check layout page. You can customize the layout of your check by changing the signature image size and location.
To customize the logo, you need to select the signature from the item picker first. Then you can resize it or drag/drop the logo to a new position. If you are satisfied with the effect, you can save your change.

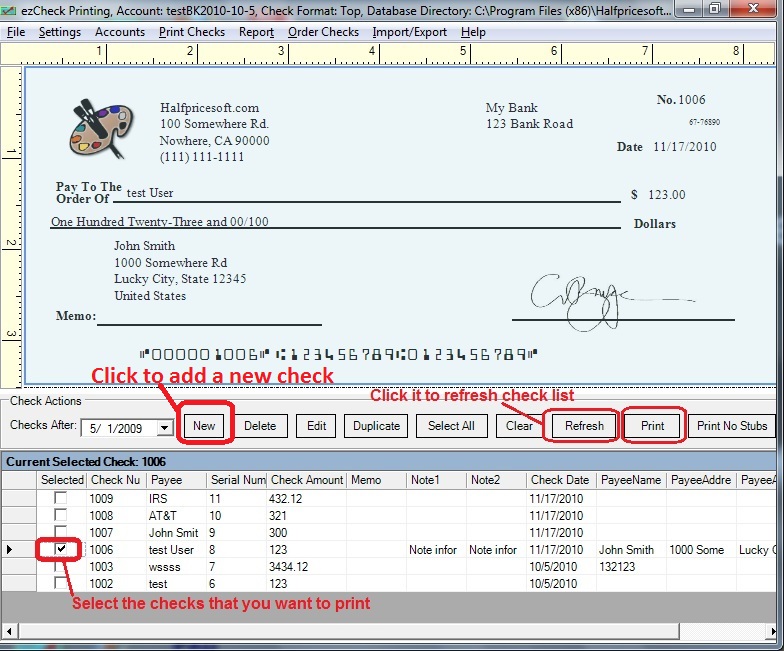
Step 4: Add a new check and print it.
Go back to the main page. Click the New button to add a check. Select this check from the check list and click the Print button to print your check.

Related articles:
Learn more about ezCheckPrinting at: http://www.halfpricesoft.com/product_ezCheck.asp