ezCheckPrinting Quick Start Guide for Mac

How to print professional-looking business checks
If you have not installed ezCheckPrinting for mac version, you can download it from the download page.
If you have not installed ezCheckPrinting for mac version, you can download it from
https://www.halfpricesoft.com/mac-check-writer/mac_check_printing_software_download.asp
You can find the detailed instructions from the download page.
Note for new MAC customers:
Do not click the installation file again after you install ezCheckPrinting software on your Mac. You can launch ezCheckPrinting application by clicking the LaunchPad button, which is similar to Windows's Show Desktop button.Click the Launchpad button, then the ezCheckPrinting icon, to run this check writer application.
Click the Launchpad button, and you will see the current applications intalled on your Mac. Click the ezCheckPrinting icon to run this check writer application.

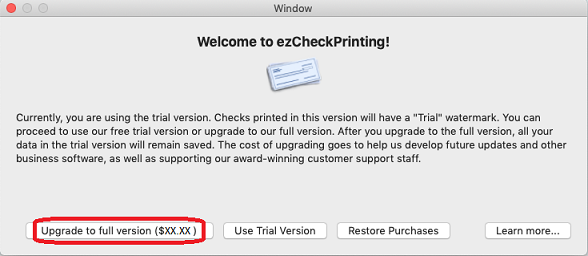
When you start ezCheckPrinting trial version, you will see the welcome screen.
Click the top menu "Accounts" then "New account" to access the 'Add New Account' screen. Enter the name of the new account and click the 'Add Account' button. The 'Check Setup' screen will then appear.
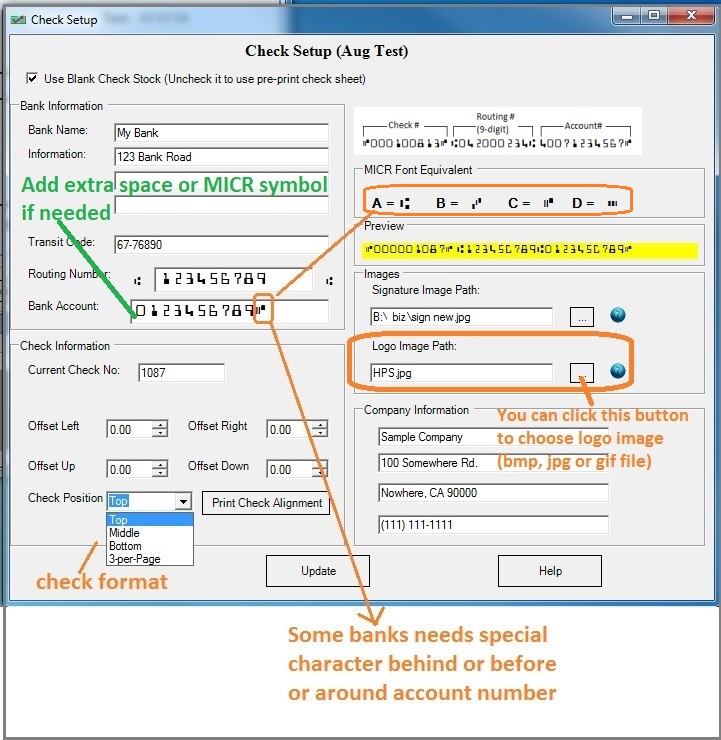
If you want to use blank check stock, check the option "Use Blank Check Stock". Otherwise, uncheck it.
Bank information is required. If you select to use pre-printed check, you can leave the default sample data here.
This information is optional. If you have this data on your old check, you can enter it. Otherwise, you can leave this field blank. US banks will not use this information to process checks today.
ezCheckPrinting supports blank check stock and pre printed checks for check on top, middle, bottom and 3-per-page business size formats.
Enter the starting check number on this screen. ezCheckPrinting will increase the check number automatically when you add a new check.
Most customers can leave the values as 0 (zero). You can adjust the value to print check higher or lower if your printer is special.
You can choose your own logo image and signature image.If you do not need to use Logo image and signature image, just delete the image path.
ALERT:
You should use jpg and bmp format image files for logo and signature. Some Mac computers cannot support the .png file. If you use a wrong image file, you may see the error message "Access Violation. Press OK to ignore and risk data corruption. Press cancel to kill the program" when you print check.(If you like the current layout, you can skip this step.)
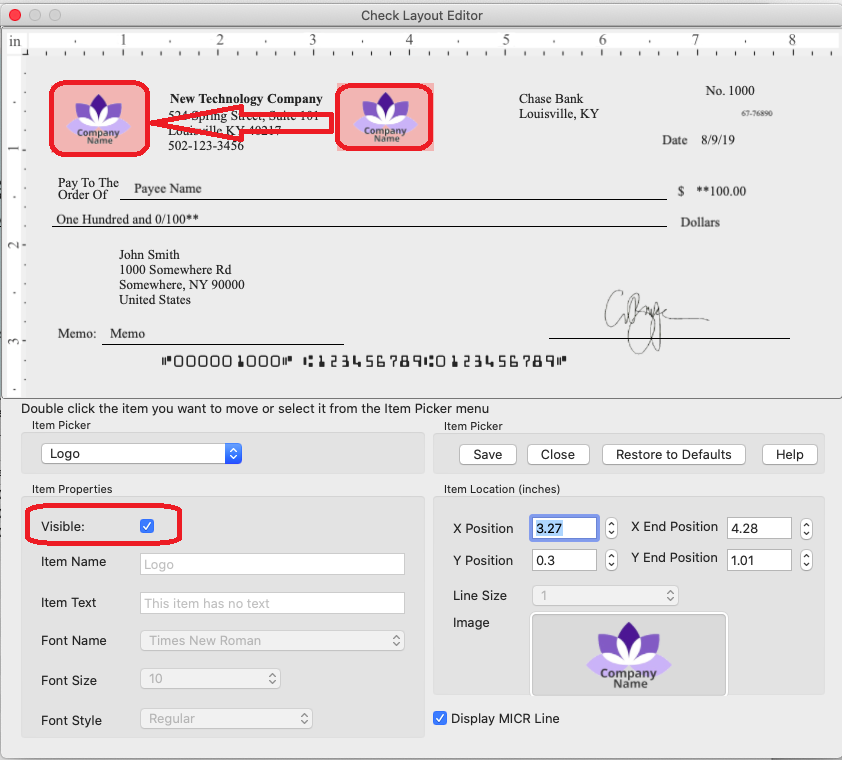
Click the top menu "Settings → Check layout" to open the check layout page. You cancustomize the layout by changing the font size, logo position, logo size or add a new label.
You can double click an item on check to select it. Then you can resize it or drag/drop it to a new location. If you are satisfied with the layout, please click the Save button to save your change.
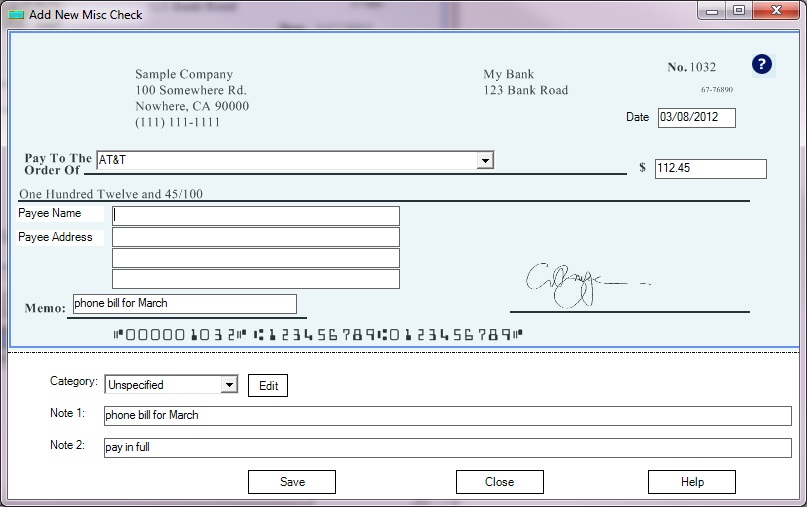
Add a check from the check list screen, then print it on your printer.
Go back to the check list screen. Click the New button to add a check.
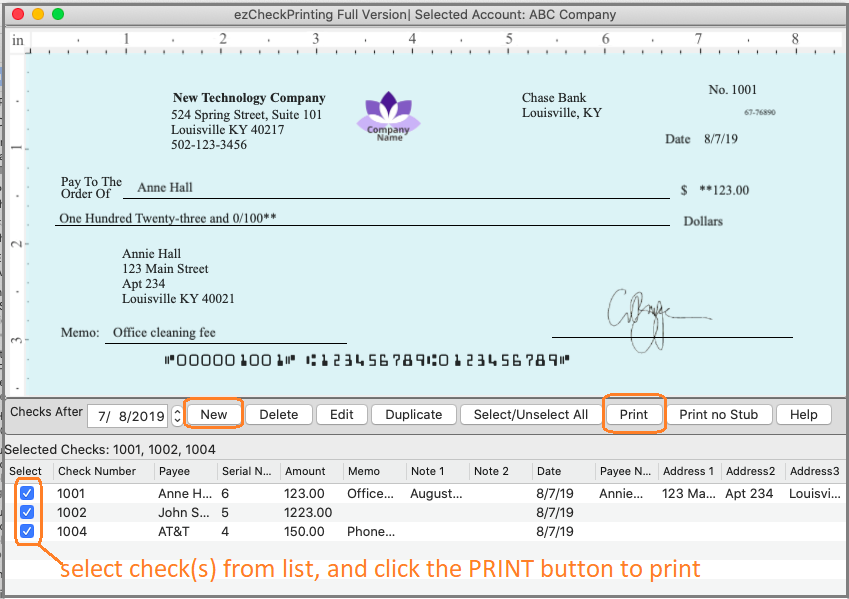
Select the check(s) from the check list and click the Print button to print check(s).
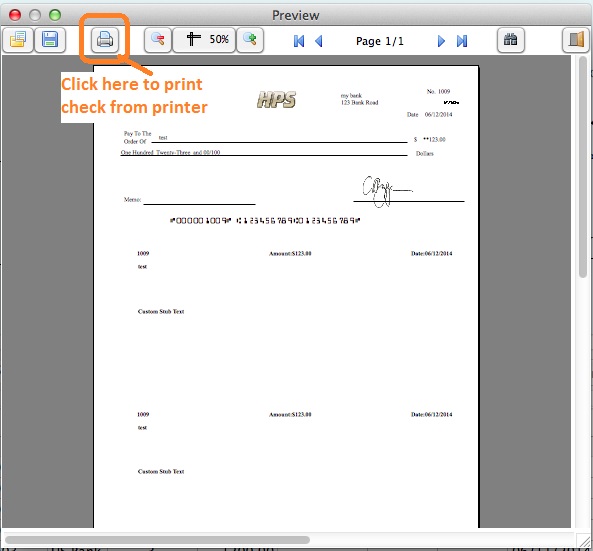
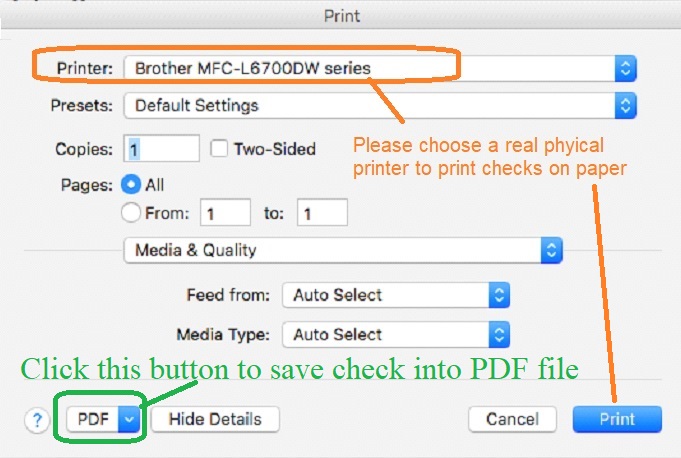
After you click the printer icon on preview screen, you will see the printer option screen. If you do not want to use the default printer, you can select a different printer in this step.
Please feel free to download and try ezCheckPrinting Software with no obligation. No registration is needed.
Please feel free to contact us whenever you need assistance. Our support team is glad to assist you. You can also check the FAQs page or email [email protected].