How to Reinstall ezCheckPrinting Software from Scratch?
Learn how to reinstall ezCheckPrinting software from scratch with this step-by-step guide. Follow easy instructions to ensure a smooth setup.
Do not skip Step 2 and Step 4!
Step 1: Log in to the computer as an administrator or a user with permissions to install/uninstall programs.
Step 2. As a precaution, back up the ezCheckPrinting data folder if needed.
You can copy all the files in the data folder to another location, such as a USB disk or cloud storage.
The default folder for ezCheckPrinting is
C:\Users\Public\Documents\Halfpricesoft\ezCheckPrinting
Step 3. Uninstall the ezCheckPrinting software.
Open "Programs and Features" by clicking the "Start" button , click on "Control Panel", click on "Programs", and then click on "Programs and Features". Select "ezCheckPrinting" from program list, and then click "Uninstall".
Step 4: Delete the following two folders: the data folder and the application folder.
The default folder for ezCheckPrinting is
C:\Users\Public\Documents\Halfpricesoft\ezCheckPrinting
The default application folder is:
C:\Program Files (x86)\Halfpricesoft\ezCheckPrinting
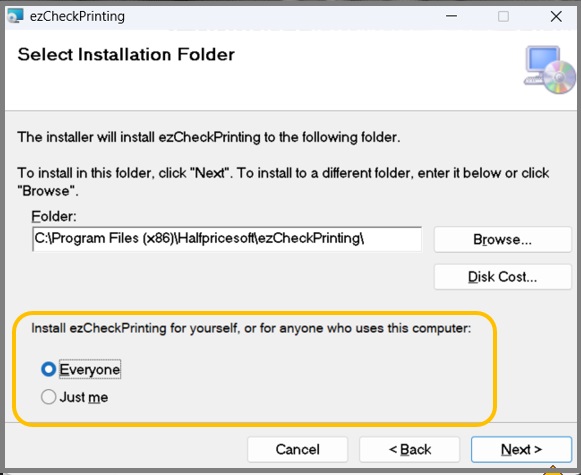
When reinstalling, choose the option to install the software for "
Everyone" if possible. This will help prevent most potential permission-related issues.