ezCheckPrinting Quickbooks virtual printer installation
The QuickBooks virtual printer works together with ezCheckPrinting.
Install ezCheckPrinting first if it is not already on your computer, then install the virtual printer.
tip
When you install ezCheckPrinting, choose Everyone so later permission problems are less likely.
Mac
On a Mac, use the QuickBooks check printing guide for Mac.
Step 1: Prepare for installation
- Log in to Windows as an administrator, or as a user who can install software. If you are not an administrator, ask your IT department for help.
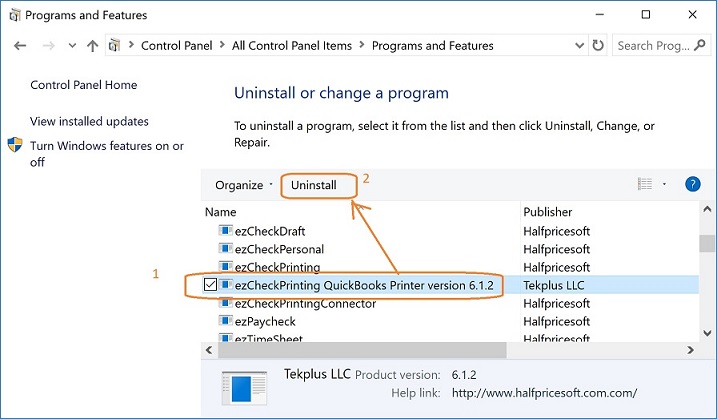
- If the virtual printer was installed before, uninstall it before installing the new version. Open Add or remove programs, select ezCheckPrinting QuickBooks Virtual Printer, and click Uninstall.
Step 2: Download the installer
The virtual printer must be used with ezCheckPrinting. If ezCheckPrinting is not installed, download ezCheckPrinting first.
Then download the virtual printer:
- Download the current virtual printer (QBDriver.exe)
- Download a previous version
- Download the Windows XP and Windows 7 build
Open the browser download list and start QBDriver.exe. A short install video is on the download page.
Step 3: Run the installation wizard
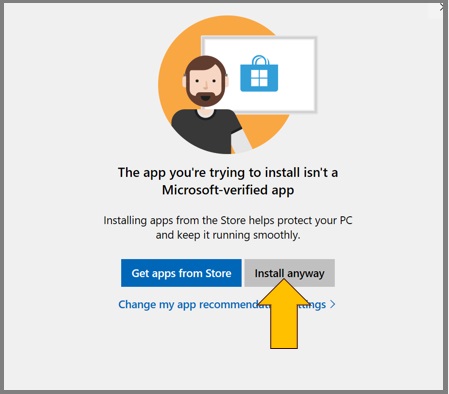
- If Windows says the app is not listed in the Microsoft Store, click Install anyway.
- On the license agreement screen, click I accept the agreement.
- Follow the rest of the wizard until it finishes.
- Confirm that ezCheckPrinting QuickBooks Driver appears in the Windows printer list.
Print checks with the QuickBooks blank-stock guide or the Quicken blank-stock guide.