Check alignment
Most checks print correctly with the default setup. If the printout is shifted, try these in order.
1. One field is in the wrong place
Move that field on the check layout screen. For example, move the company address without moving the rest of the check.
See How to adjust one field on a check

2. The whole check prints too high or too low
Print at actual size. This is the most common alignment problem.
- Open the printer properties and set the scale to 100 percent (actual size).
- Turn off Auto Scale, Scale to fit, Shrink to fit, and any similar option.


3. The MICR line is too high or too low
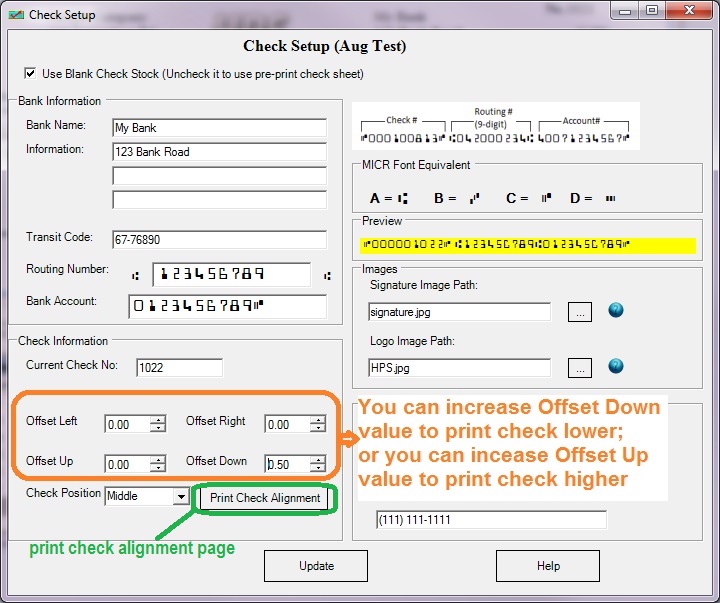
Open Settings > Check setup, and change Offset left, Offset right, Offset up, or Offset down.
To print the check lower, increase Offset down.
Watch: How to print a check higher. The same offsets are covered in Adjust the MICR print position.
4. The middle or bottom check or stub is shifted
The top check has to be correct before the margin can place the others.
- Open the printer properties and set the scale to 100 percent (actual size).
- Turn off Auto Scale, Scale to fit, Shrink to fit, and any similar option.
- Adjust the offset values, if needed, until the top check is in the right place.
- Open Settings > Check setup, and change Check margin to move the middle and bottom checks or stubs.
