Fund & Run Payroll
With your company set up, employees added, and verifications complete, you are ready to connect your bank account, fund the Treasury, and authorize your first payroll disbursement.
Step 1: Add Your Company Bank Account
- Navigate to Company Management → Bank Accounts in the sidebar.
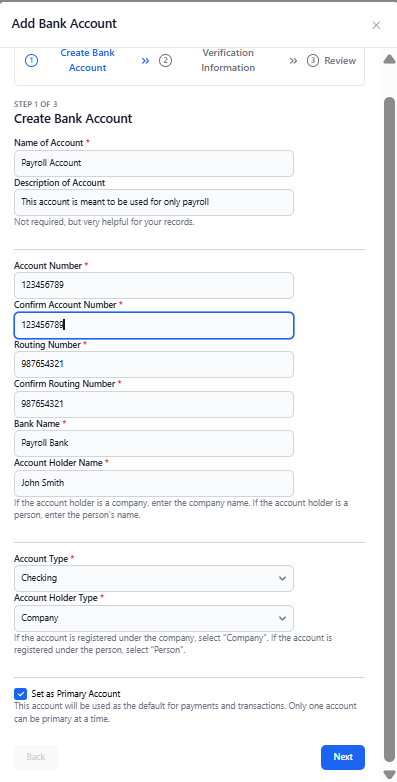
- Click "Add Bank Account" and populate the following required fields: bank account, routing number, name of the account, bank name, account holder name, account type, and account holder type.
- Once all fields have been filled in, click Next.
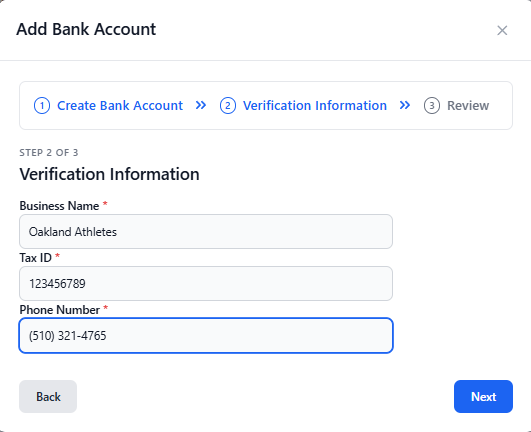
- On the next screen, add the business name, tax ID, and phone number. Then select Next.
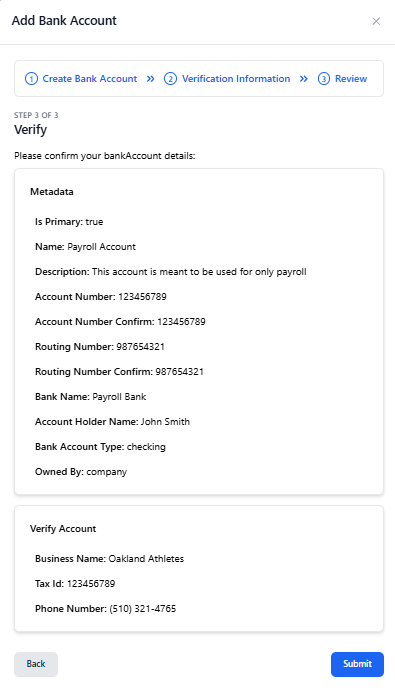
- On the next page, review all of the information entered and select the Submit button to finish adding a bank account to your company profile.
Each employee also needs to add and verify their own personal bank account as their direct deposit destination. They can do this from their personal Bank Accounts page after activating their account.
Step 2: Prefund the Treasury
ezPaycheck Online requires your Treasury settled balance to cover the total net pay before a payroll can be authorized.
- Navigate to Treasury in the sidebar to see your current settled balance and pending prefunds.
- If the settled balance is below the required amount, you will see a warning on the Payroll page.
- Go to Company Management → Company Information → Edit Company. Set up your Payroll Prefunding by adding your pay period, first payroll date, and estimated payroll amount.
- Select Submit when completed.
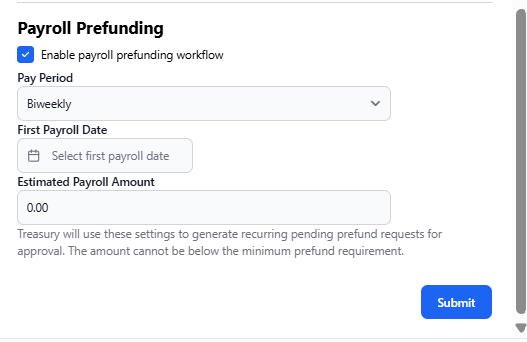
Prefunding your account is key to expediting the payroll process. If your settled balance is below the required prefunding balance, the Run Payroll button will warn you and the disbursement cannot be authorized until the balance is sufficient. Without prefunding, you will have to wait for additional ACH transactions to complete so your settled balance is higher than your payroll amount, which can add a 3-day delay to this process.
Step 3: Import Pending Payroll Entries from Desktop ezPaycheck
Payroll amounts (wages, deductions, taxes) are calculated in ezPaycheck Desktop and then uploaded to ezPaycheck Online as pending entries.
- In ezPaycheck Desktop, complete your payroll calculation for the pay period.
- In ezPaycheck Desktop, go to Direct Deposit → Upload data to my cloud account to send the pending entries to ezPaycheck Online.
- In ezPaycheck Online, navigate to Payroll. The Pending Entries table will display the imported entries waiting to be disbursed.
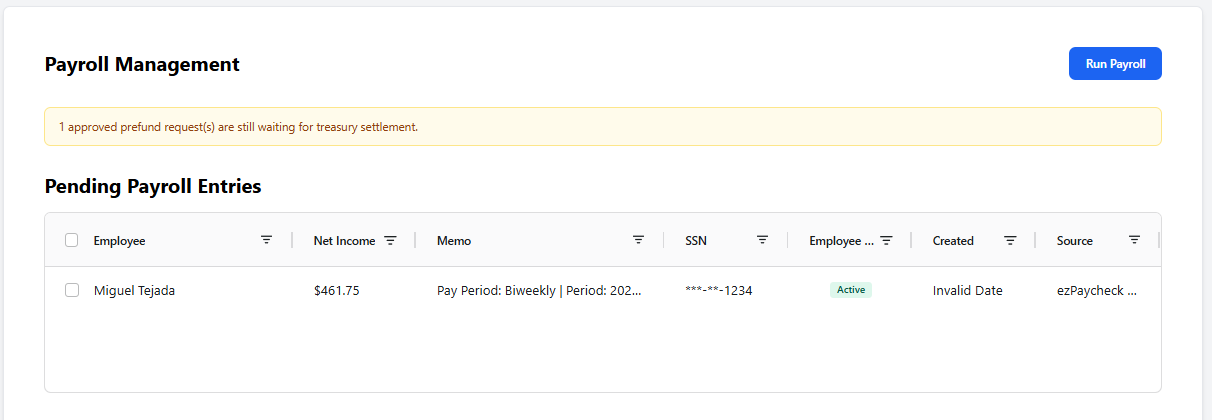
If the Pending Entries table is empty, return to ezPaycheck Desktop and confirm the payroll entries were exported/uploaded successfully. You should also double check that the employee is set up for direct deposit.
Step 4: Run Payroll
In ezPaycheck Online navigate to Payroll in the sidebar. Click "Run Payroll" to launch the Run Payroll wizard.
Step 1: Introduction
Review the summary of what will happen, then click Next.
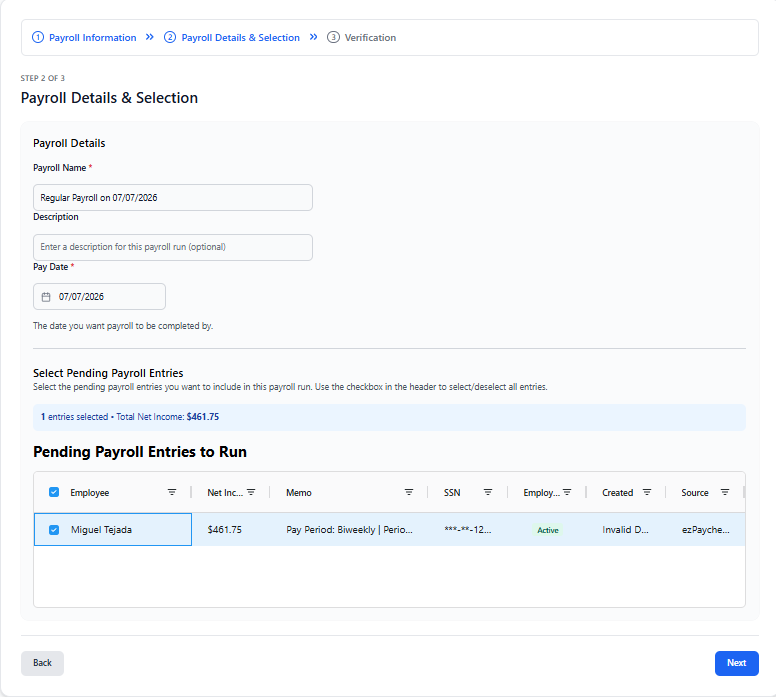
Step 2: Payroll Details & Selection
Fill in the payroll details:
| Field | Description |
|---|---|
| Payroll Name | Defaults to "Regular Payroll on <date>". Edit if needed. |
| Description | Optional free-text note for your records. |
| Pay Date | The date employees receive their funds. Defaults to the earliest possible ACH completion date. |
Below the fields, a table lists all available pending payroll entries. Check the box next to each entry you want to include in this payroll run. The total count and total net pay are displayed at the bottom.
Step 3: Verification
Review the summary before authorizing:
- Payroll name and description
- Pay date
- Selected entries and employee names
- Total net pay to be disbursed
If everything looks correct, click "Authorize Payroll Disbursement".
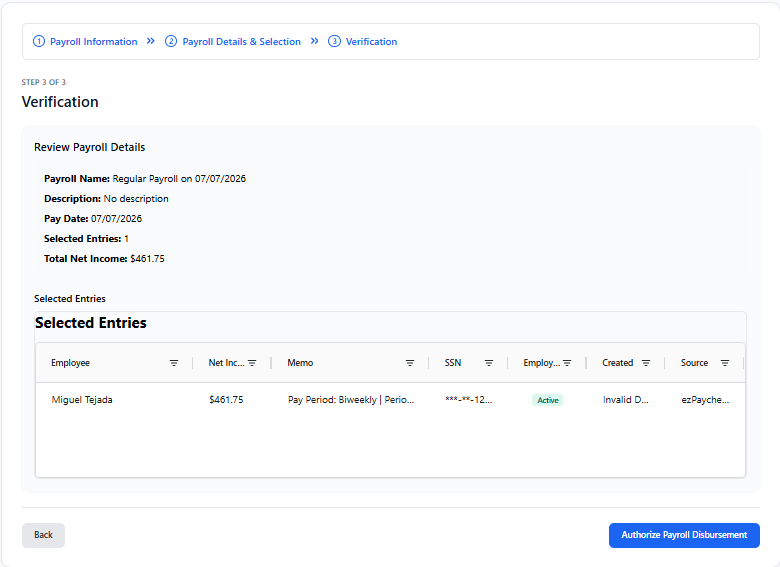
Clicking "Authorize Payroll Disbursement" initiates ACH transfers to employee bank accounts. Ensure the pay date, selected entries, and total amount are correct before confirming — ACH transactions may not be reversible once initiated.
You will see a confirmation message: "Payroll executed successfully!"
Track each payroll's progress from the Payroll page. Click any entry in the Payroll Entries history table to open the detail view, which shows the status stepper, inbound funding transfers, and per-employee disbursement legs.
Step 5: Employees Download Their Paystub PDF
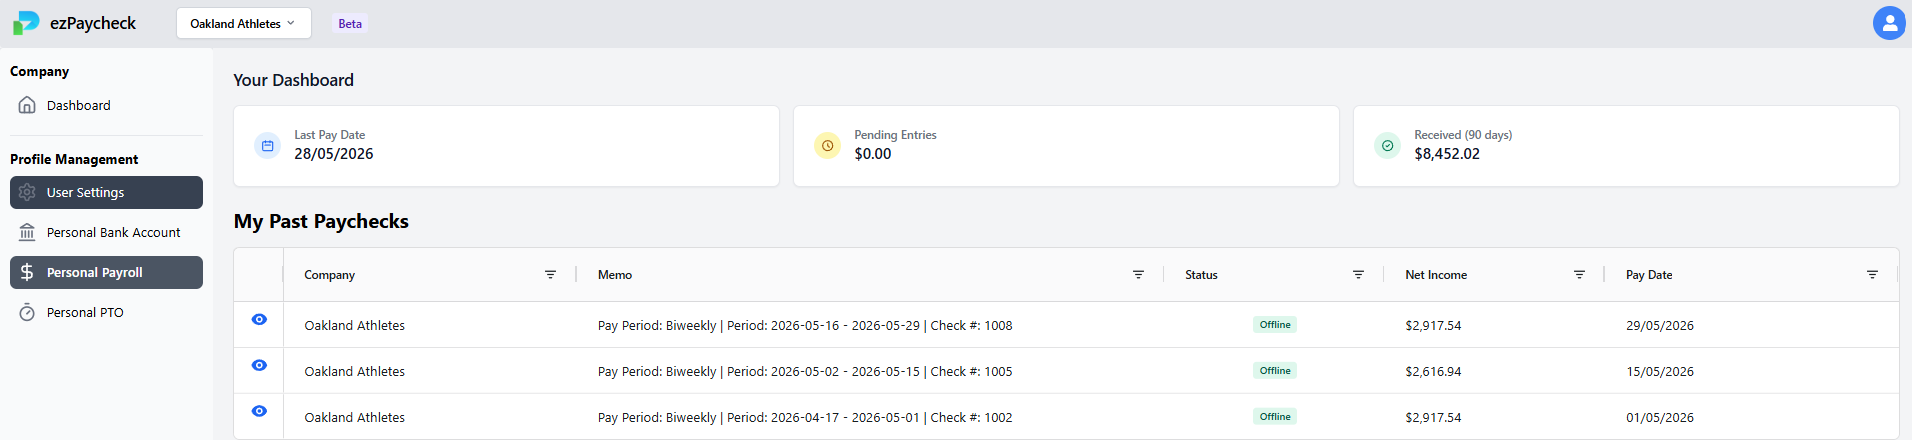
After the payroll is processed and the ACH transfers complete, employees can log in to ezPaycheck Online and download their Paystub PDF from their personal Personal Payroll page.
You have completed the ezPaycheck Online Quick Start. Your company is set up, employees are onboarded, and your first payroll disbursement is authorized. For ongoing payroll runs, simply import new pending entries from ezPaycheck Desktop and repeat Step 4.