How to write a check on preprinted check with ezCheckPrinting Software
With ezCheckPrinting software, you can print checks easily on both blank stock in house. You can also fill in the check data on pre-printed checks.
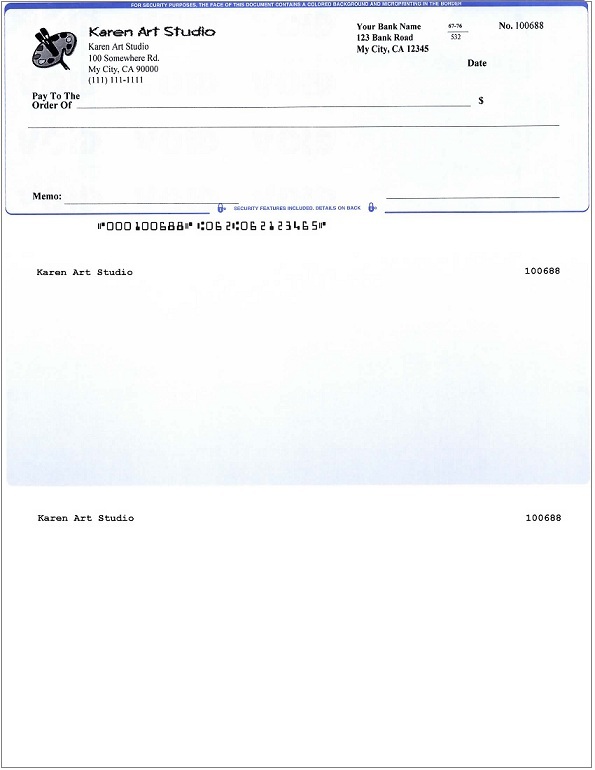
Option 1: for the standard pre-printed check
Your check is with the completed bank and business information. You can fill in data only to deposit your check.
Option 2: for the non-standard blank check
For example: your blank check paper is missing key details such as the MICR line, company name, logo, or bank information.
Option 1: Using standard blank check
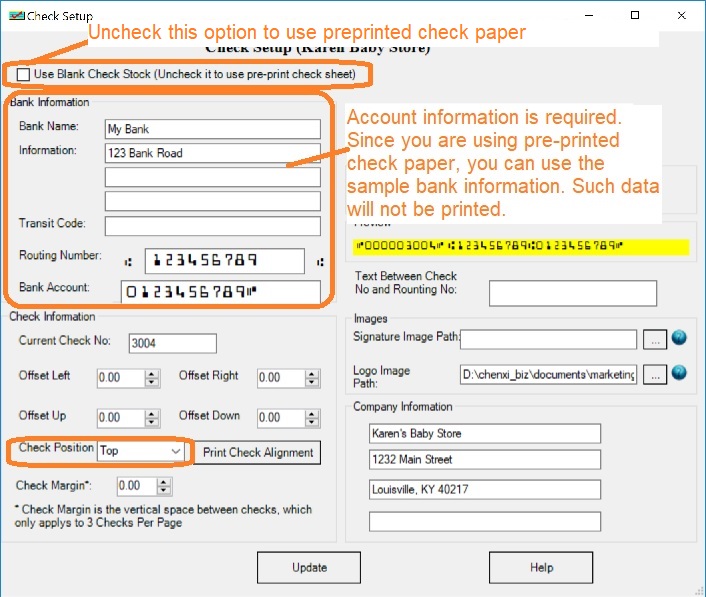
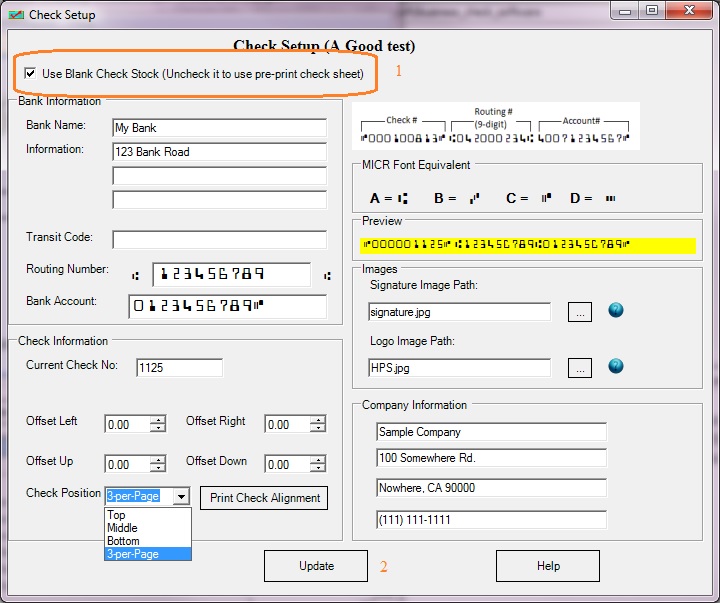
Click to view larger image Step 1.1: Set up ezCheckPrinting to use pre-printed check paper
- Start ezCheckPrinting application
- Click the top menu "Settings->Check setup" to open check setup screen
- Uncheck the option "Use Blank Check Stock" to write a check on pre-printed check paper
- Click the UPDATE button to save your changes.
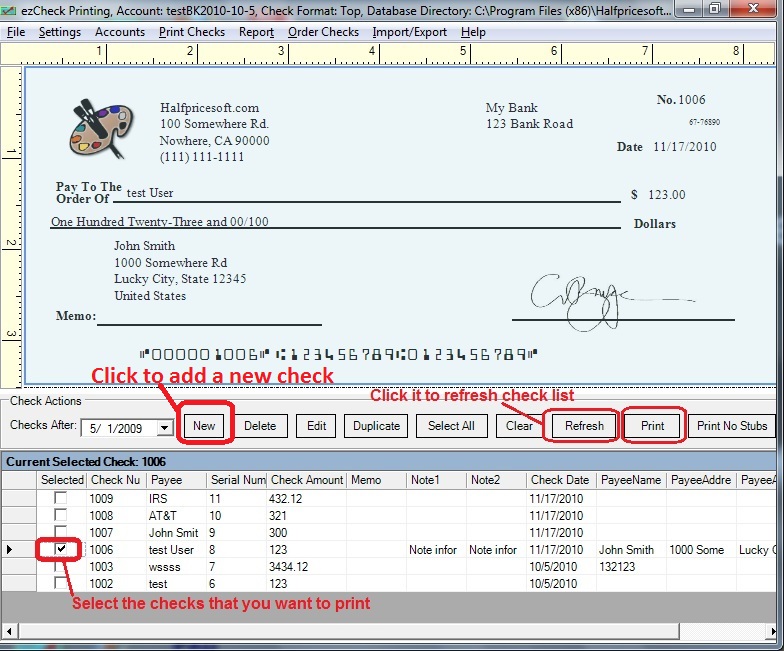
Step 1.2: Add a new check and print it
Go back to the main page. Click the New button to add a check. Select this check from the check list and click the
Print button to print your check.
ezCheckPrinting check writer will fill out the check data only if you are using pre-printed check paper.
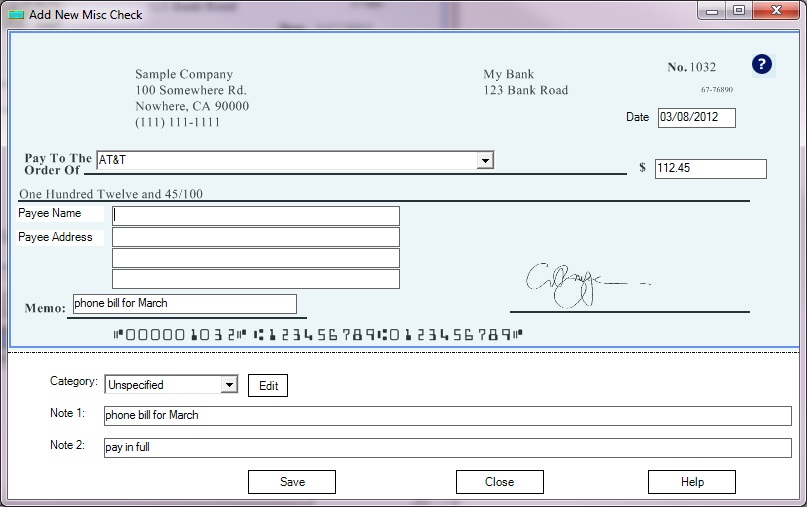
1.2.1 Add and save check
1.2.2 Select a check from list and print
1.2.3 Review the check data on the screen. If there are no issues, print the check data onto a blank check.

Step 1.3: Customize check Layout or adjust printing position if needed.
If your pre-printed check is with special format, you may need to print the entire check higher or lower, or you may need to print one field higher or lower.
How to adjust check alignment if there is any printing issue https://www.halfpricesoft.com/business_check_software/check-print-alignment-issue.asp How to customize check layout https://www.halfpricesoft.com/business_check_software/customize-check-layout.asp Option 2: Using non-standard blank checks
If your blank check paper is missing key details such as the MICR line, company name, logo, or bank information, follow this guide to print both the check data and the missing information.
Step 2.1: Choose the blank stock option from check setup screen
- Start ezCheckPrinting application
- Click the top menu "Settings->Check setup" to open check setup screen
-
Check the option "Use Blank Check Stock"
- Click the UPDATE button to save your changes.
Step 2.2: Customize check layout, hide the fields that have already been printed on your check paper
2.2.1. Hide fields Start ezCheckPrinting check writer, click the top menu "Settings->Layout setup" to open check layout screen.  Select the field you need to hide from Item Picker Uncheck the option "Visible" Save the change
 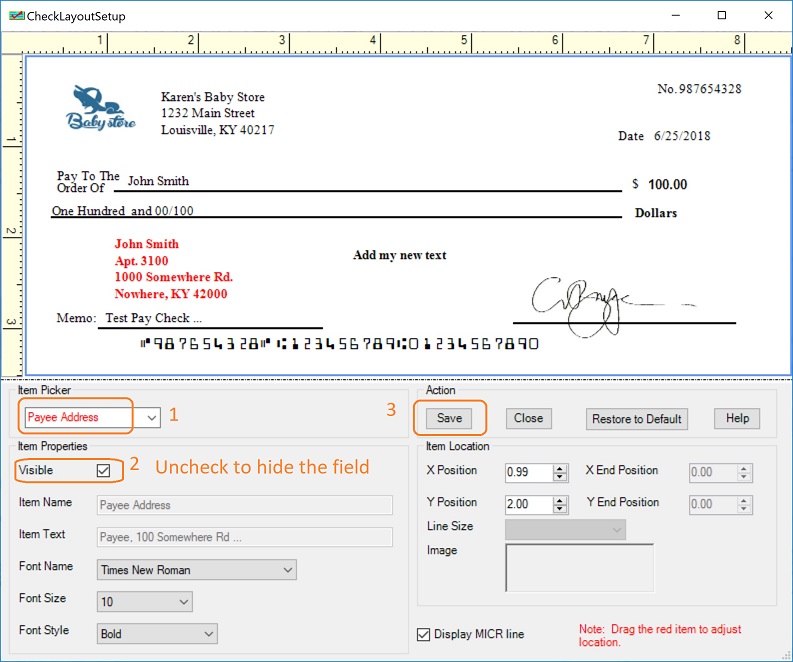 2.2.2. Hide the MICR encoding line Start ezCheckPrinting check writer, click the top menu "Settings->Layout setup" to open check layout screen. Uncheck the option "Display MICR line" Save the change
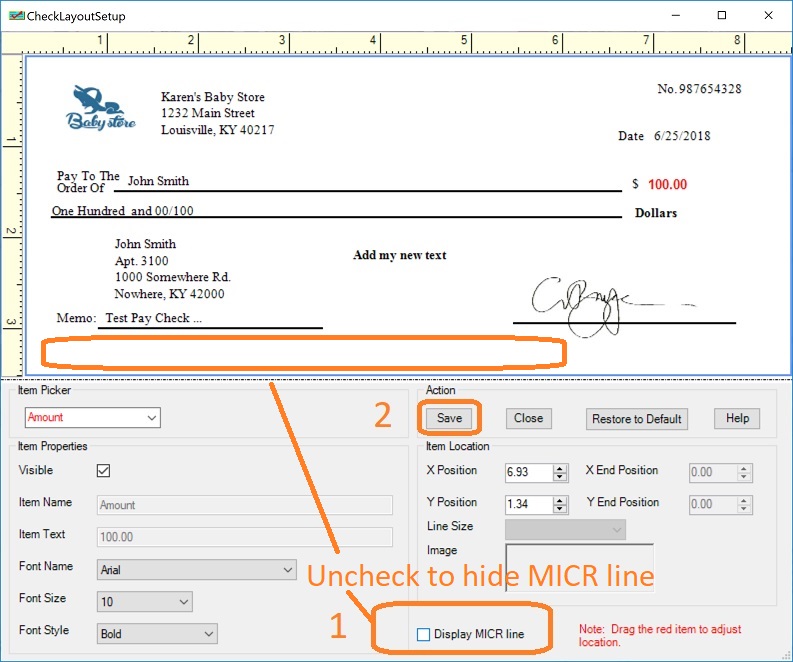
Step 2.3: Add a new check and print