Mac Users: Please check ezCheckPrinting for Mac here
Professional check printing software for Windows. Free trial with no obligation.
Follow these simple steps to get ezCheckPrinting up and running
Watch Installation VideoEnsure you're logged into Windows as an administrator or a user with installation permissions.
Click the download button above to get checkprintingsetup.msi. Once downloaded, locate the file in your Downloads folder and double-click to launch the installer.
Follow these sub-steps during installation:
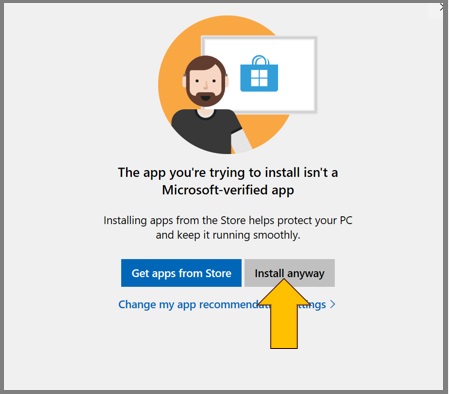
Click "Install anyway" if prompted
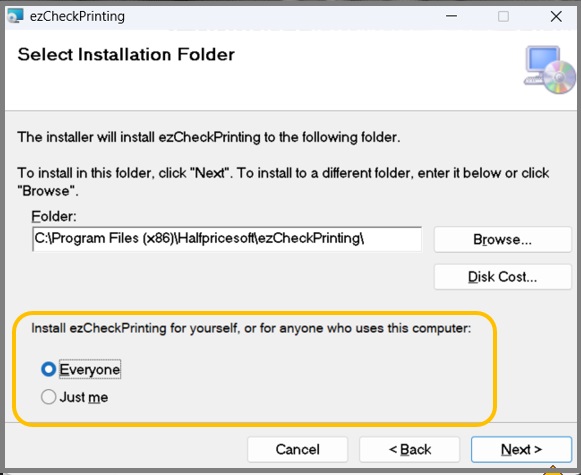
Choose installation scope
A desktop shortcut will be created for easy access. Click it to run ezCheckPrinting and start printing professional checks.

Desktop shortcut for easy access
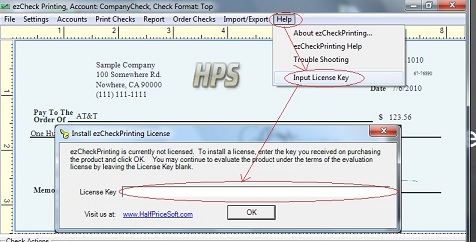
If you've already purchased a license, start ezCheckPrinting and go to Help -> Input License Key to activate your full version.
New to ezCheckPrinting? Follow our step-by-step guide to set up your account and start printing professional checks.
Having issues? Check our troubleshooting guides for common problems and solutions.