ezCheckPersonal: Data Missing Issue and Solution
ezCheckPersonal will not remove your data automatically even you uninstall it. If you see the data missing issue, please follow the steps below.
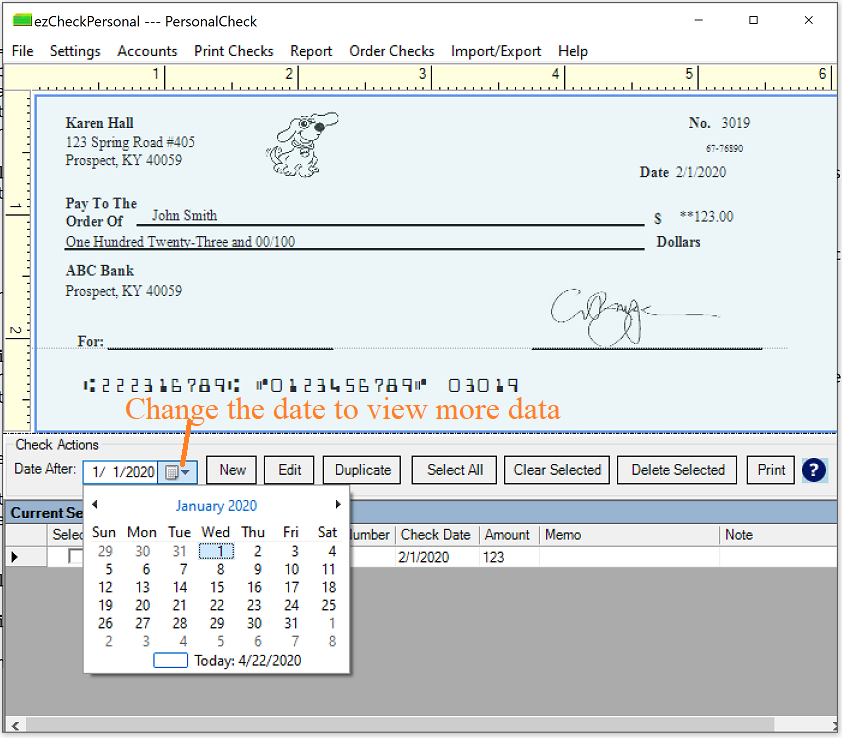
Step 1: If your bank account information is still correct, you can change the "Check After" date to view more checks
Start ezCheckPrinting, you can change the "Checks After" date to view more data.
Step 2: Switch Account
If you lost current account set up, you can click the top menu "Accounts", then click the sub menu "Select Account" to view account list and switch current account
2.1: Click the top menu "Accounts" then "select account" to view account list 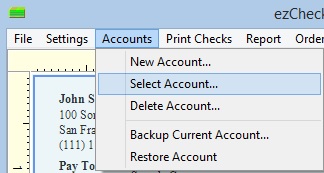 2.2: Select an account from list and click the "OK" button to switch the account
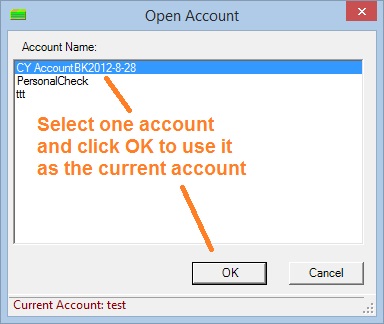
Step 3: If you backed up your data before, you can restore your data easily.
3.1 Start ezCheckPrinting, then click the top menu "Account->Restore account" and select the database file. ezCheckPrinting will copy this database file to the application folder. 3.2 Then select the new database file as current company database by clicking the top menu "Accounts->Select Account". 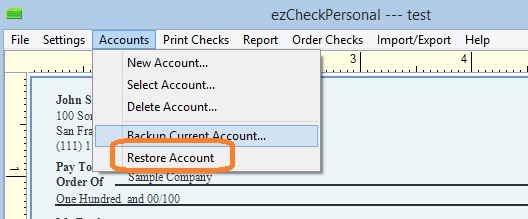
Step 4: Copy the file back manually
4.1 Find the data file
The database file is .mdb (Microsoft Database) file.
The default data folder is:
C:/Users/Public/Documents/Halfpricesoft/ezCheckPersonal
Or you can search "*.mdb file" manually.
4.2 After you find the data, you can copy it back to the default folder. 4.3 Switch the current account by clicking the ezCheckPersonal top menu "Accounts->Select Account". Related Links: