Note: The license codes for different versions are different. For example: if you purchased the previous version 5 for XP computer, you need to purchase the new license to use ezCheckPrinting version 9 on Windows 11.
If you have any question, you can refer to the guides:
Option 1: Use database back up and restore functions to move data
Step 2.1.1: start ezCheckPrinting on the old computer and back up data to USB disk
Click the top menu "Account->backup Current account" to back up the data.
You can click the triangle button behind "Save in" field to change the current path to your USB disk. You can modify the back up new file name as you like.
Click the Save button to save your current database file to the new location.
Step 2.1.2: Start ezCheckPrinting on the new computer and restore data
click the top menu "Account->Restore account" and select the database file from USB disk. ezCheckPrinting will copy this database file to the application folder.
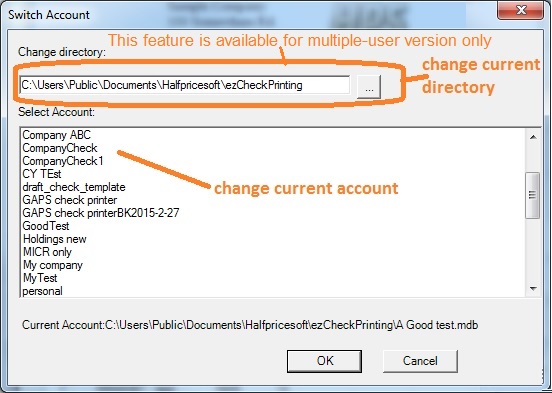
Step 2.1.3: Switch the current data to view data
Select the new database file as current company database by clicking the top menu "Accounts->Select Account".
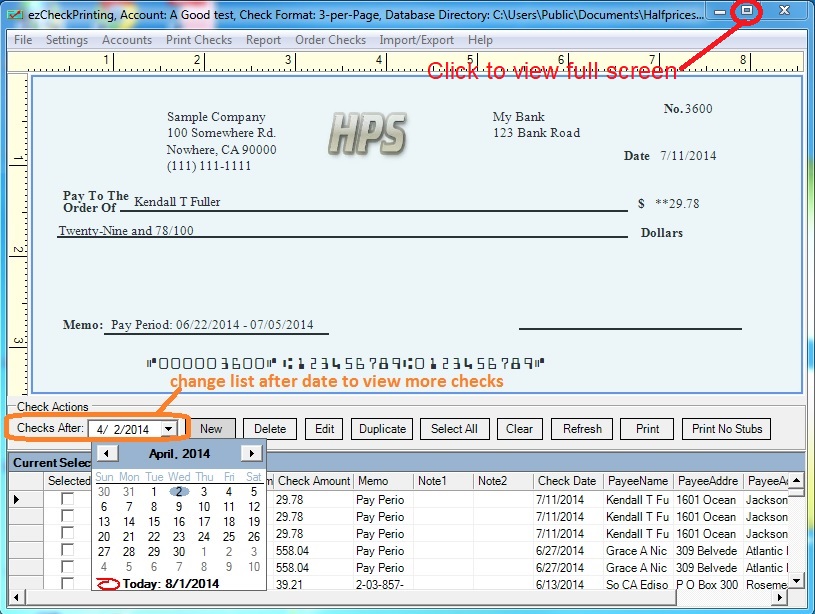
Step 2.1.4: Change the "Check After" date to view more checks (optional)
Option 2: Move data manually
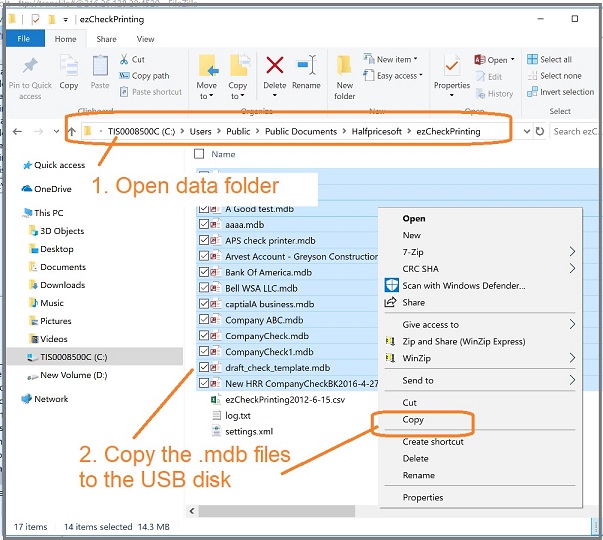
Step 2.2.1: Backup Multiple Accounts Manually to USB disk
If you are a CPA and have many client accounts, it will be faster to back up the data manually.
The default folder for ezCheckPrinting is
C:\Users\Public\Documents\Halfpricesoft\ezCheckPrinting
The database files are .mdb (Microsft Access database) files. You can copy all the .mdb files to the USB disk manually.
Step 2.2.2: Copy the data files from the USB disk to the new computer
The default folder for ezCheckPrinting is
C:\Users\Public\Documents\Halfpricesoft\ezCheckPrinting
The database files are .mdb (Microsft Access database) files. You can copy all the .mdb files back from the USB disk.
Step 2.2.3: Switch the current data to view data
Select the new database file as current company database by clicking the ezCheckPrinting top menu "Accounts->Select Account".
Step 3: Transfer license
If you purchased ezCheckPrinting previous version(ie: ezCheckPrinting Version 8) and need to use ezCheckPrinting Version 9 version on the new computer, you need to purchase a new license.
If you need to use ezCheckPrinting on both computers, please contact us to upgrade your ezCheckPrinting order and add one extra license.
If you will stop using ezCheckPrinting Version 9 on the old computer, please follow the guide below to transfer the license to the new computer.
3.1 Unregister ezCheckPrinting 9 license from the old computer
Start ezCheckPrinting Version 9 on the old computer, click the top menu "Help" then click the sub menu "register/unregister license key".
Unregister the license key.
3.2 Register ezCheckPrinting Version 9 license on the new computer
Print QuickBooks/Quicken Checks on Blank Stock In One Step
Compatible with QuickBooks/Quicken Online, Desktop Version 2025, 2024, 2023 and previous versions.
Compatible with Windows 11, 10, 8, 7, XP and other versions.
Unlimited accounts and checks wth one flat rate.
Try ezCheckPrinting Virtual Printer free demo today. No obligation. No credit card required.