ezAccounting software comes with payroll features. Designed with simplicity in mind, ezAccounting payroll software speeds up payroll tax calculations, paycheck printing and tax form reporting.
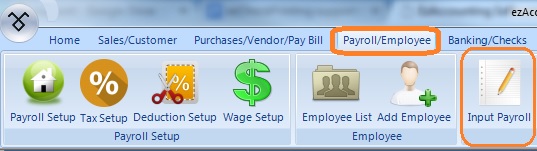
You can access payroll functions by clicking the top menu "Payroll/Employee".
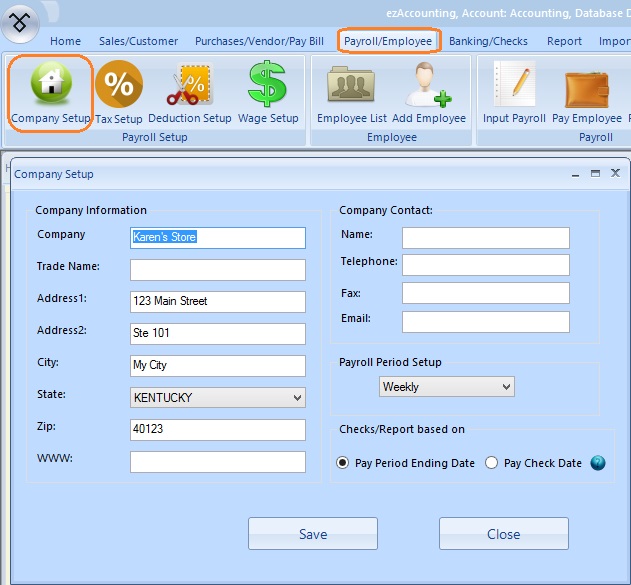
Step 1: Set up Company Information
1.1 Set up company general information here
Click to view bigger image
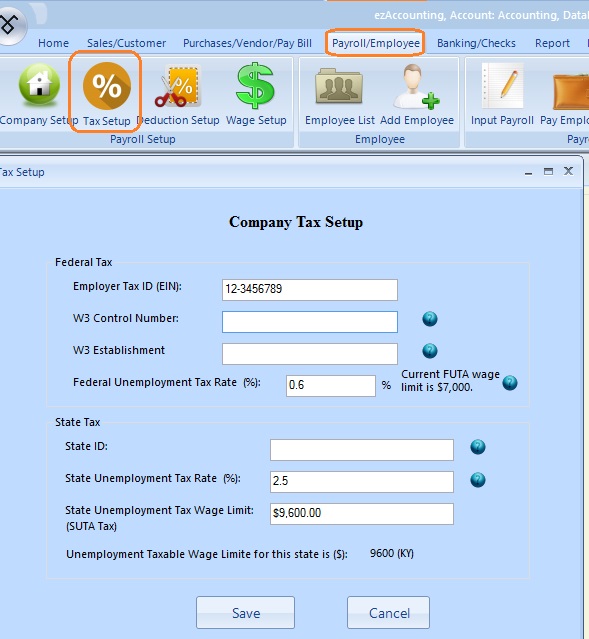
1.2 Set up company tax information option
Click to view bigger image
- company Tax ID
- W3 control number and W3 Establishment number (optional): These two fields will be used for W2 and W3 forms only.
- FUTA (Federal Unemployment Tax): Employer-side tax only and will not be printed on paycheck stubs
The default tax rate is 6%. However, many companies can take up to 5.4% credit. Please check with your local IRS office to see what rate you should use.
- SUTA (State Unemployment Tax): Employer-side tax only and will not be printed on paycheck stubs
- Save your changes
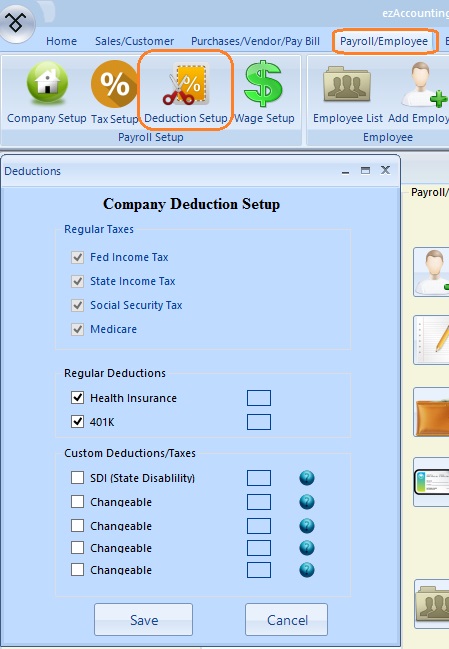
1.3 Set up company deduction options
Click to view bigger image
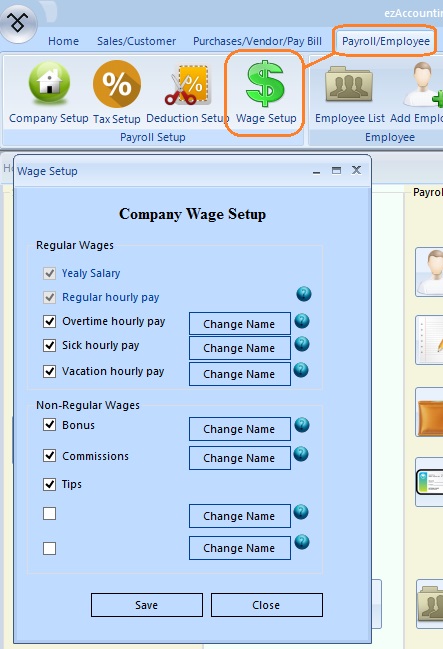
1.4 Set up company Wage options
Click to view bigger image
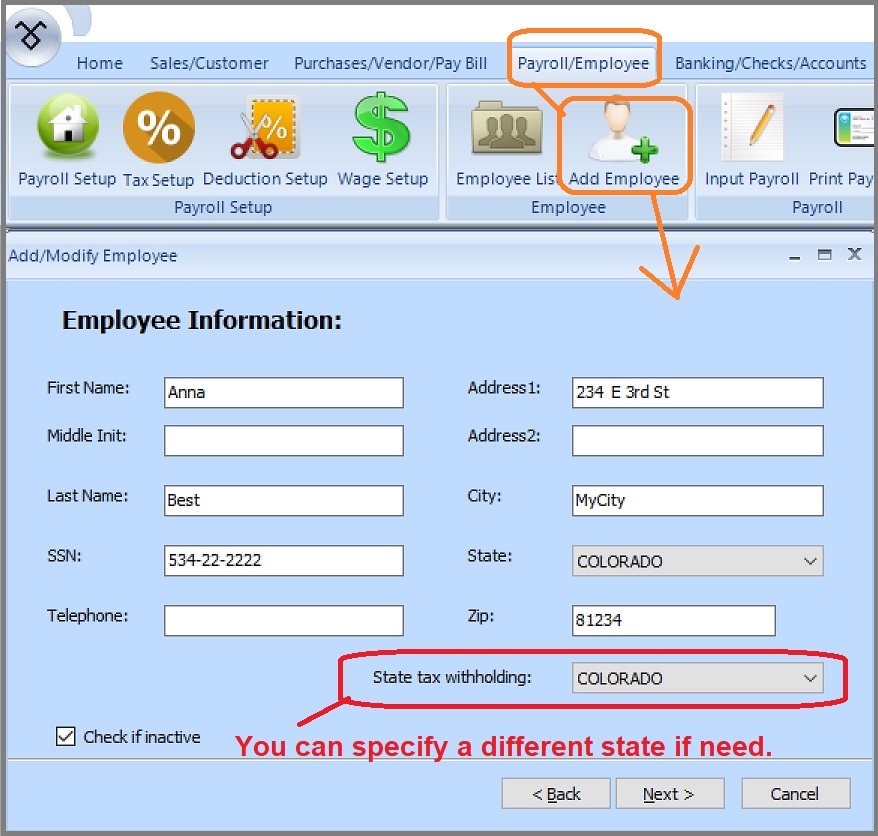
3.1 Add employee general information
(Click image to enlarge)
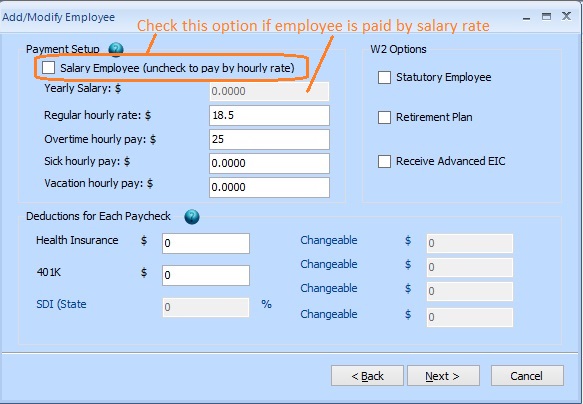
3.2 Employee payment and deductions
- If you set up employee to be paid by salary, then check the option box "Salary Employee" and enter the amount for yearly salary
- If you set up employee to be paid by hourly, then uncheck the option box "Salary Employee", leave Year Salary field as "$0", and enter the hourly rate.
- Set up the deductions for each paycheck.
(Click image to enlarge)
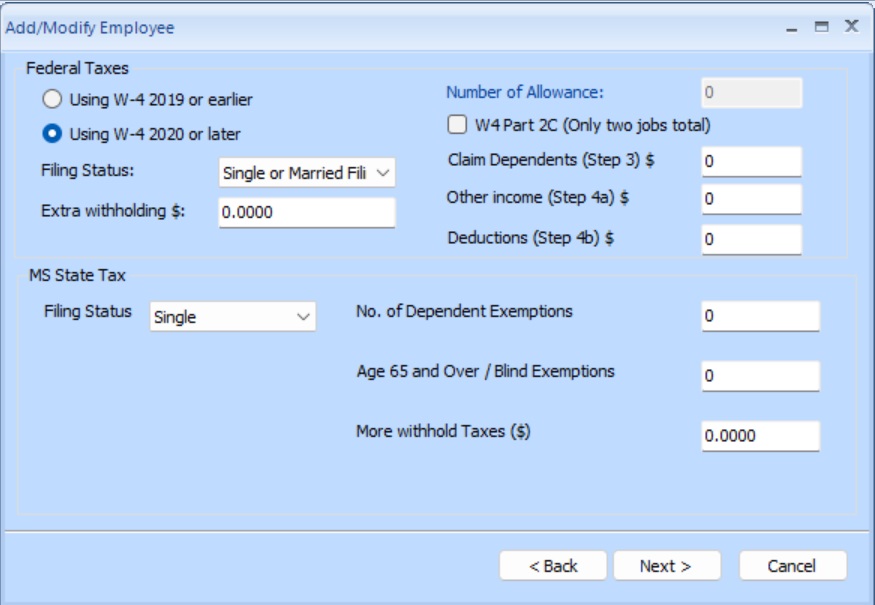
3.3 Employee settings for federal and state taxes
(Click image to enlarge)
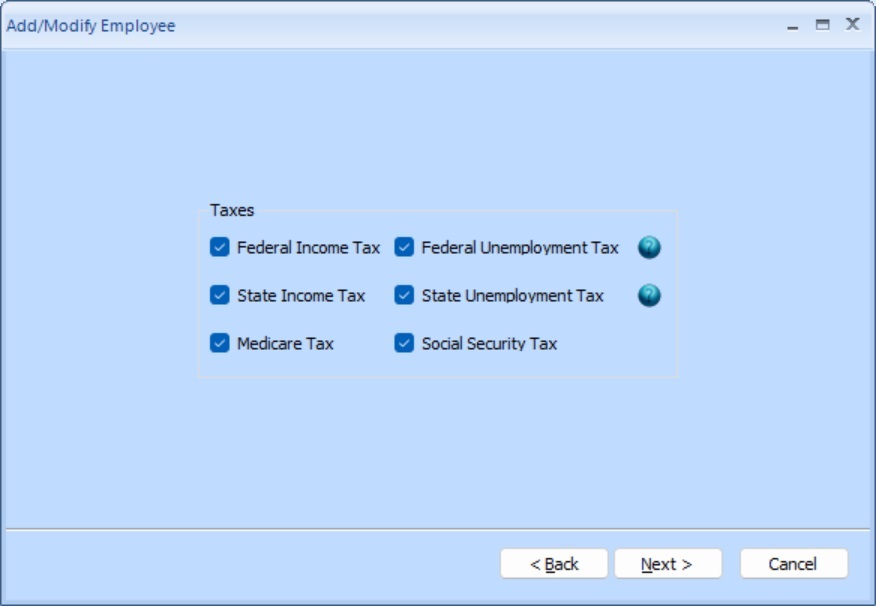
3.4 Edit tax options
Nonprofits and churches that do not need to deduct FICA taxes for clergy members and some employees, can uncheck Social Security tax and Medicare tax here.
(Click image to enlarge)
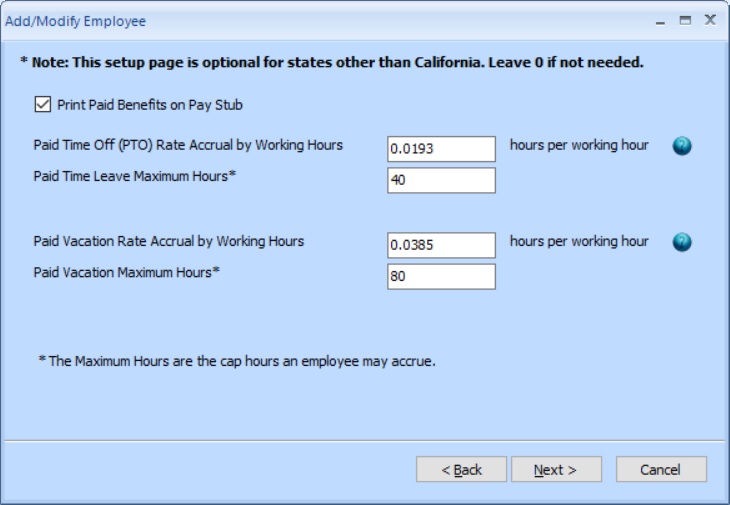
3.5 Employee PTO settings
(Click image to enlarge)
Step 4: (Optional) Switch to ezAccounting payroll in mid year - enter YTD manally
Customers can start to use ezAccounting payroll feature any time in a year. Here is the step by step guide about how to enter YTD data manually if you need to enter previous payroll data.
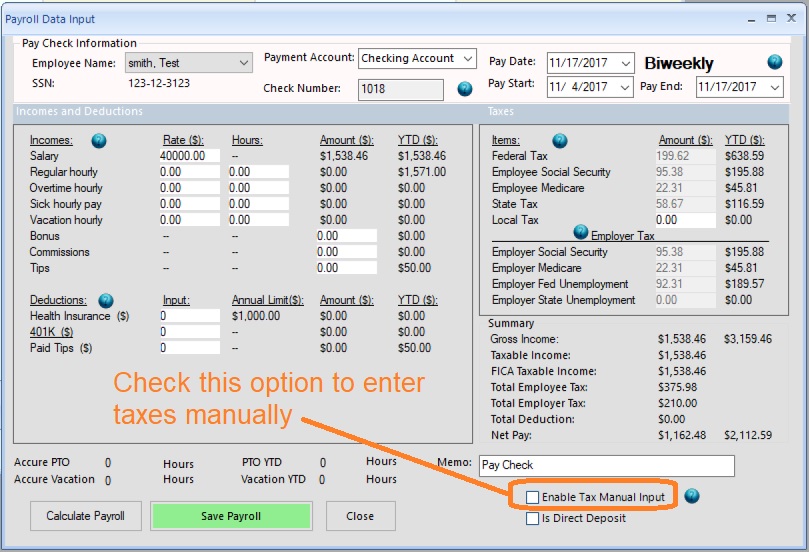
5.1 Add a paycheck by salary rate
On new check screen:
- Select this employee from list
- Specify Pay Date, Pay Start Date and Pay End Date.
- Review the information on screen
- Save this new check.
- Click the CLOSE button to close this screen for other operations (such as adding check for another employee or printing checks)
(Click image to enlarge)
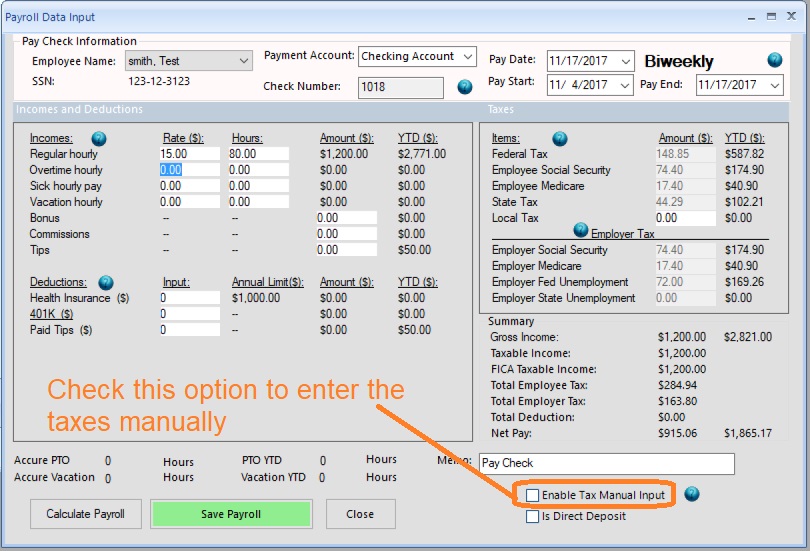
5.2 Add a paycheck by hourly rate
On new check screen:
- Select this employee from list
- Specify Pay Date, Pay Start Date and Pay End Date.
- Enter hours - Review the information on screen
- Save this new check.
- Click the CLOSE button to close this screen for other operations (such as adding check for another employee or printing checks)
(Click image to enlarge)
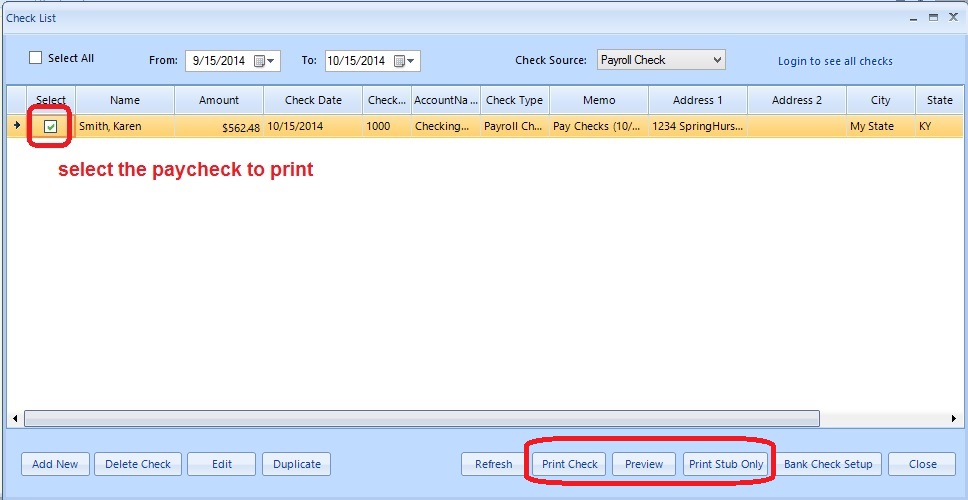
5.3 Print Paychecks
You can select multiple paychecks from list and click the Print button to print paychecks together.
(Click image to enlarge)
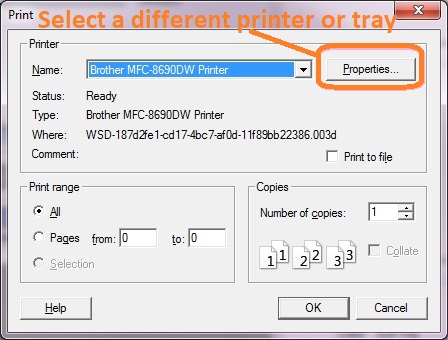
5.4 Select a printer
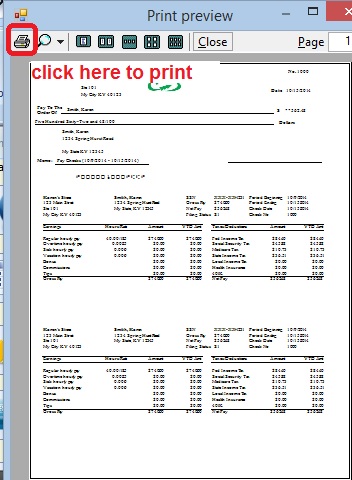
5.5 Print or print preview check
- If you click the "Print" button, the check will be printed on paper directly.
- If you click the "Preview" button, you can preview check(s) on screen and click the printer icon to print it on paper.
ezAccounting software is the right in house accounting solution for small businesses needing to document and report on incoming and outgoing cash flow including sales, receipts, payments and purchases. It also supports payroll processing and tax form printing.
Try the ezAccounting free demo - no credit card or obligation required.