With ezAccounting software, you can design and print professional-looking checks in house. You can print checks on blank stock and pre-printed checks.
Set up Checking Account and Print Checks
ezAccounting software can support multiple bank checking accounts. ezAccounting comes with one checking account by default. If your company has more than one checking accounts, please refer to this guide How to add a new checking account
Step 1: Set up Bank Account
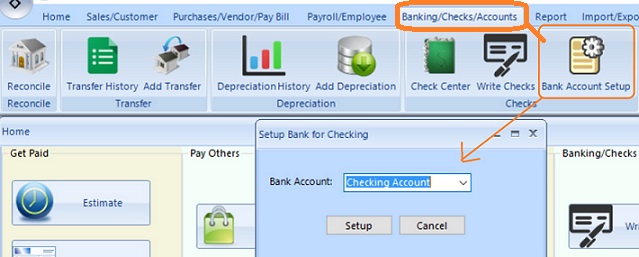
You can click the top menu "Banking/Checks/Accounts", then click "Bank account setup" to view bank account list.
(Click image to enlarge)
Select the checking account from list, then click the "Setup" button to view bank information (Click image to enlarge)
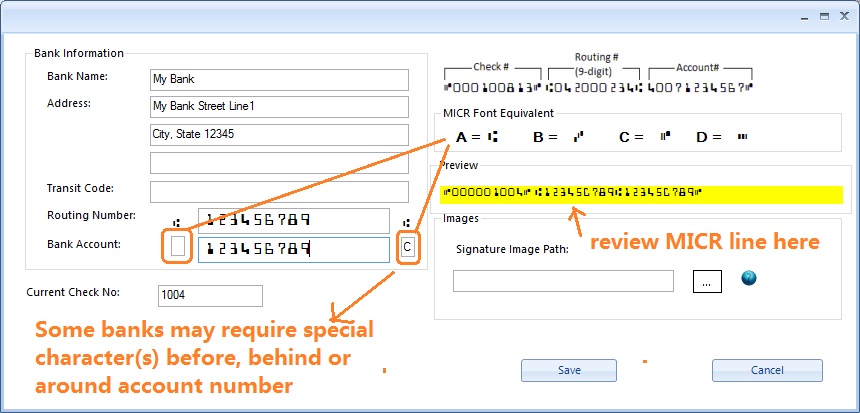
-Input bank name.
-Bank Routing Number.
-Bank Account Number.
-Check Number.
-Optional Signature image.
- Click the Save button to save your changes
Step 2: Choose Check Format(Optional)
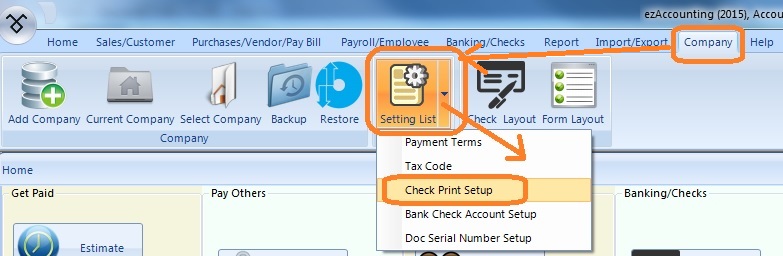
2.1 The default check format is Check-on-top. If you need to print checks in other formats (ie: bottom, middle or 3-per-page), you can click top menu "Company", then click "settings list" and choose "check print setup" option.
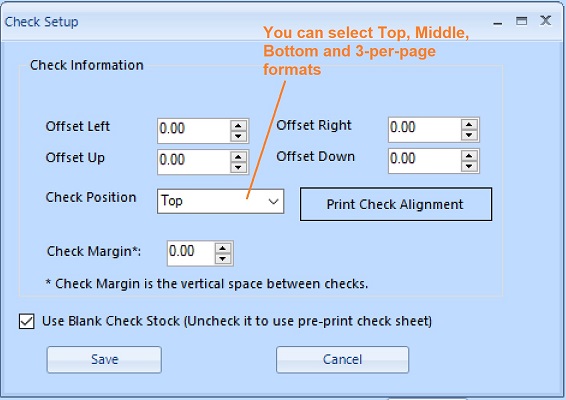
2.2 You can choose the option to print check on blank stock or pre-printed check here. You can also choose check position here.
Step 3: Customize Check Layout(Optional)
You can click the top menu "Company" then "Check Layout" to view check layout screen. You can change font size, hide an item, move an item, resize logo or add extra fields on checks in this step.
Step 4: Write and Print a Check
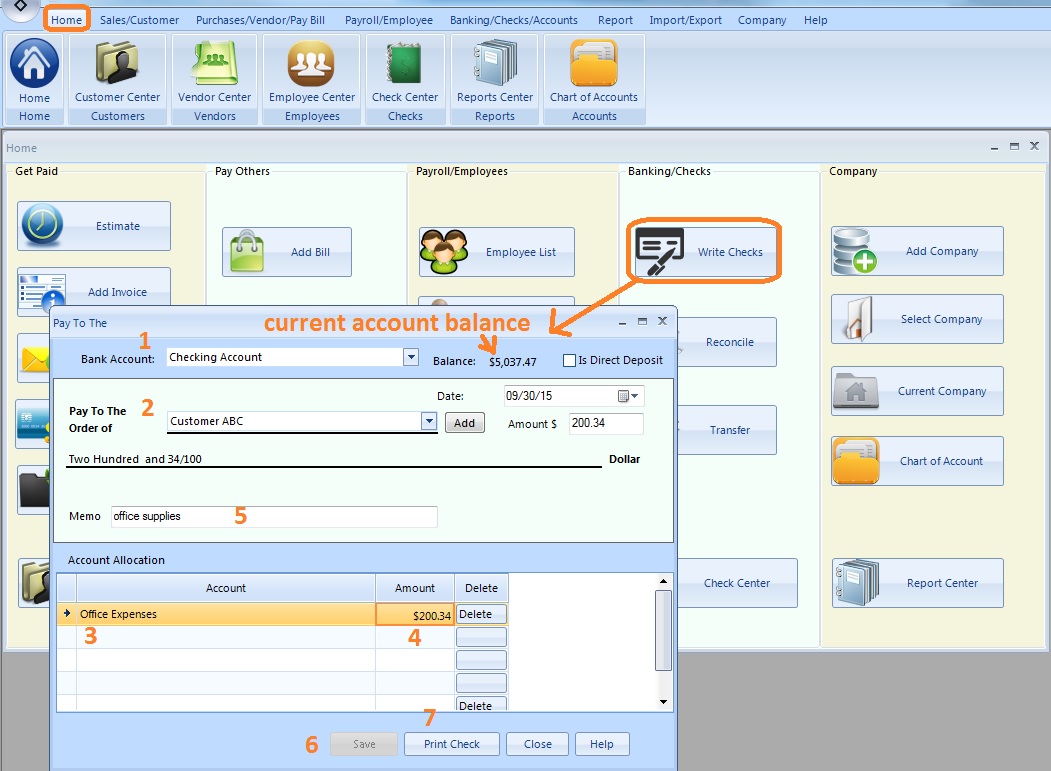
You can click the top "Bank/Checks" tab then click the sub menu "Write Checks" to open the Check Writing screen (Click image to enlarge)
-Select Bank Account to write checks.
-Add/Select payee, could be vendor, customer, employee.
-Add the payment account allocation.
- Click the Save button to save your changes
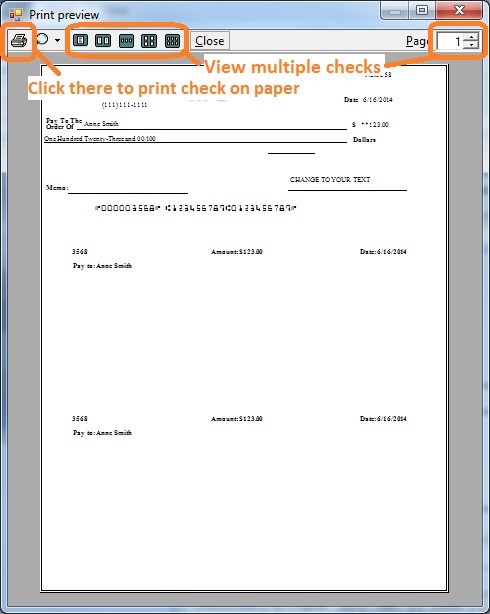
- After save check, click "Print Check" to print new check
ezAccounting software is the right in house accounting solution for small businesses needing to document and report on incoming and outgoing cash flow including sales, receipts, payments and purchases. It also supports payroll processing and tax form printing.
Try the ezAccounting free demo - no credit card or obligation required.