ezCheckPrinting Check Writer: How to Restore Data
(Click to view
Mac Version)With ezCheckPrinitng check writing software, you can
backup data and restore easily. Here is guide on how to restore data.
ezCheckPrinting database backup file is .mdb file. Please do NOT open this file manually or with Microsoft Access. You should open the file with ezCheckPrinting software. Please follow the steps below to restore your data.
Option 1: If you back up data in the default data folderOption 2: If you back up data to a USB disk, server, cloud or other data storage locationOption 3: If you are a CPA and have many accounts
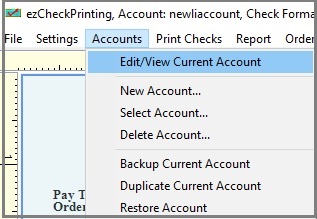
1.1 Click ezCheckPrinting top menu "Accounts" then "select account" to change the current account.
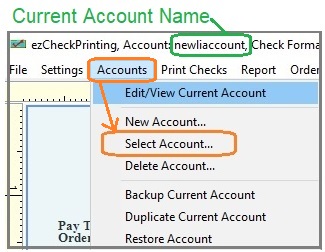
1.2 Select the backup file from the account list.
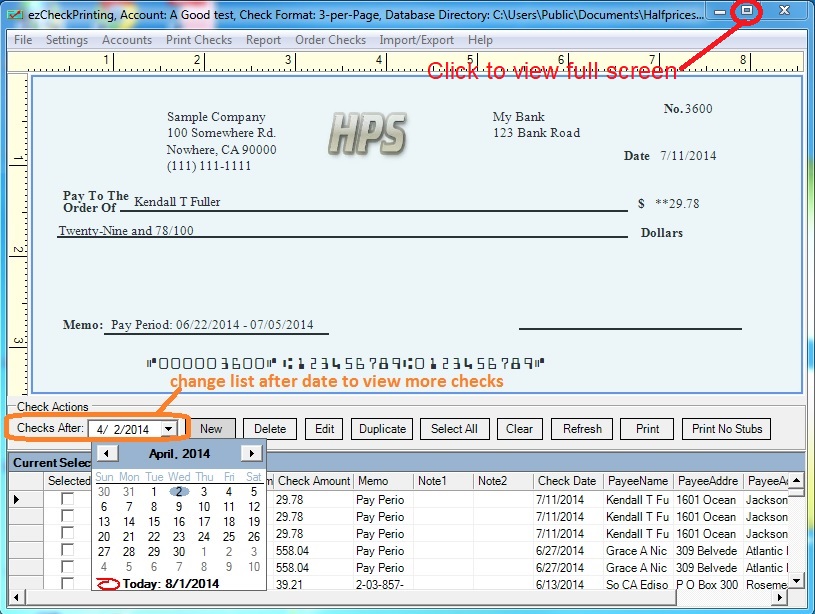
1.3 You may need to change the "Check After" date to view previous checks.
Option 2: Restore Data with ezCheckPrinting Restore Function
Step 2.1: Restore backup file
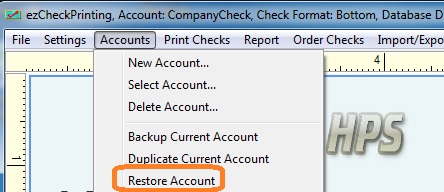
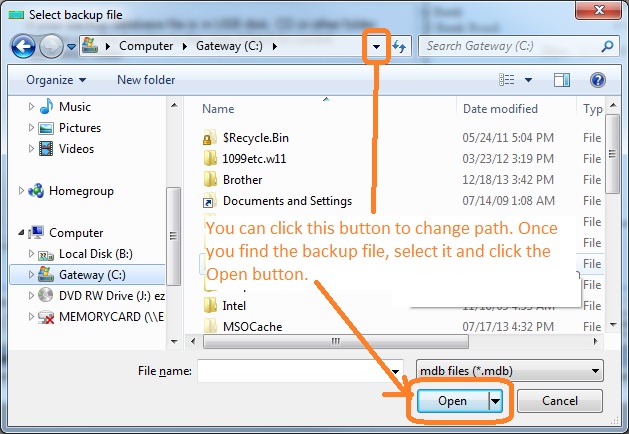
2.1.1 Click the top menu "Accounts" then the sub menu "Restore Account".
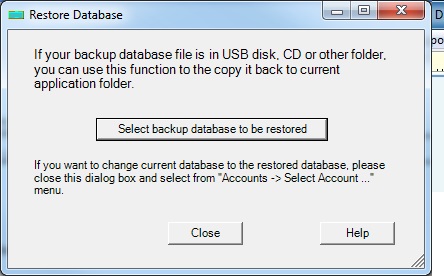
2.2.1. select your backup file
Step 2.2: Switch the current account
You can click ezCheckPrinting top menu "Accounts" then "select account" to change the current to the new backup database file.
Step 2.3: Change the "Check After" date to view more checks
You may need to change the "Check After" date to view previous checks.
Option 3: Restore Multiple Accounts Manually
If you are a CPA and have many client accounts, it will be faster to restore the data manually.
The default data folder for ezCheckPrinting is:
C:\Users\Public\Documents\Halfpricesoft\ezCheckPrinting
The database files are .mdb (Microsft Access database) files. You can copy all the backup files to your data folder, and then switch the current account by clicking ezCheckPrinting top menu "Account" then "select account".
 | Design and Print Professional Checks Yourself- Print checks on blank stock with logo and signature
- Fill in data on pre-printed checks
- Print blank checks to fill in later
- QB virtual printer for QuickBooks/Quicken(for Windows)
- Unlimited accounts and checks for Windows and Mac.
Try ezCheckPrinting free demo version with no obligation and no credit card needed.
|
Related Links:
How to print paychecks on balnk stockHow to print personal check on blank stockHow to Print QuickBooks Check on Blank stockHow to Print pre-printed check with MICR Encoding to fill in manuallyHow to Print check with logoHow to print check draft to collect payment online