System Requirements
Windows 11, 10, 8, 7, XP and other Windows or MAC machines .net framework
Steps to Download ezCheckPersonal Software
Step 1: Prepare for Installation
Ensure you're logged into Windows as an administrator or a user with installation permissions!!!
Step 2. Download ezCheckPersonal installation package.
Click "Download ezCheckPersonal" button. Once the download is complete, open your browser's download file list by clicking the download icon. Launch the installation by clicking on 'ezcheckpersonalsetup.msi.'
Step 3: Install ezCheckPersonal.
3.1 If you encounter an alert stating that ezCheckPersonal is not listed in the Microsoft Store, confidently click 'Install anyway' to proceed.
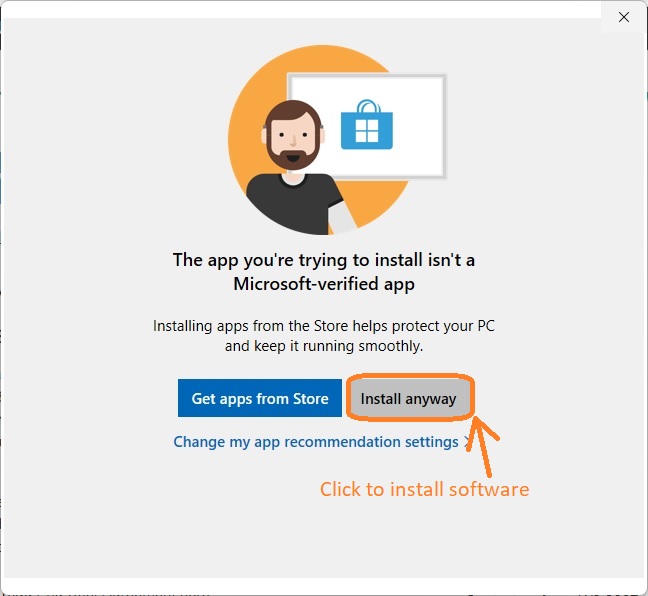
3.2 Navigate through the user-friendly ezCheckPersonal installation wizard. Accept the terms by clicking 'I Agree' on the license agreement screen.
3.3 Choose whether to install ezCheckPersonal for yourself or all users on the computer.
3.4 Follow the on-screen instructions to complete the installation process seamlessly.
Step 4: Accessing ezCheckPersonal.
4.1 A desktop shortcut will be created for easy access. Click it to run ezCheckPersonal software.

4.2 If you have purchased the license key, you can enter the license key. Otherwise, you can test drive the trial version. The trial version will print Trial image on checks. You need to purchase and enter the license to remove it.
Step 5: Set up bank account and print checks.
 How to set up account and print checks
Troubleshooting
ezCheckPersonal installation issues and solutions
ezCheckPersonal running issues and solutions


Related Links:
EzPersonal software Quick Start Guide
How to uninstall ezCheckPersonal check printing software
 Common Installation Issues and Solutions