ezPaycheck Quick Start Guide
Step 4: How to switch to ezPaycheck in mid-year by entering YTD data manually
<
Previous step: add employees Next Step: add/print checks >
Download Now >
Buy Now
If you switch to ezPaycheck payroll software in mid year, you have two options to enter the previous payroll data.
Option 1: If you just issued a few paychecks, you can enter the previous checks manually one by one. Option 2: You can use the YTD feature to enter the summary data only without entering the checks.
How to enter the YTD data manually
YTD means Year-to-date. It is a period from the beginning of the current year, and continues up to the present day. The YTD information on the check stubs will update automatically each time you add a new paycheck.
This YTD entry feature is for customers who start ezPaycheck in mid-year. (If you start ezPaycheck from Jan 1, you do not need to enter YTD manually.)
For example, company ABC handles paychecks for employee Ryan Smith manually from 1/1/2011 to 6/30/2011. They plan to use ezPaycheck from 7/1/2011-7/15/2011 pay period. So instead of entering the old checks one by one by using the
after the fact payroll feature, they can enter the YTD summary data here.
If you have not set up company and add employee, please refer to step 1 "Set up company information" and step 2 "Add a new employee" first.
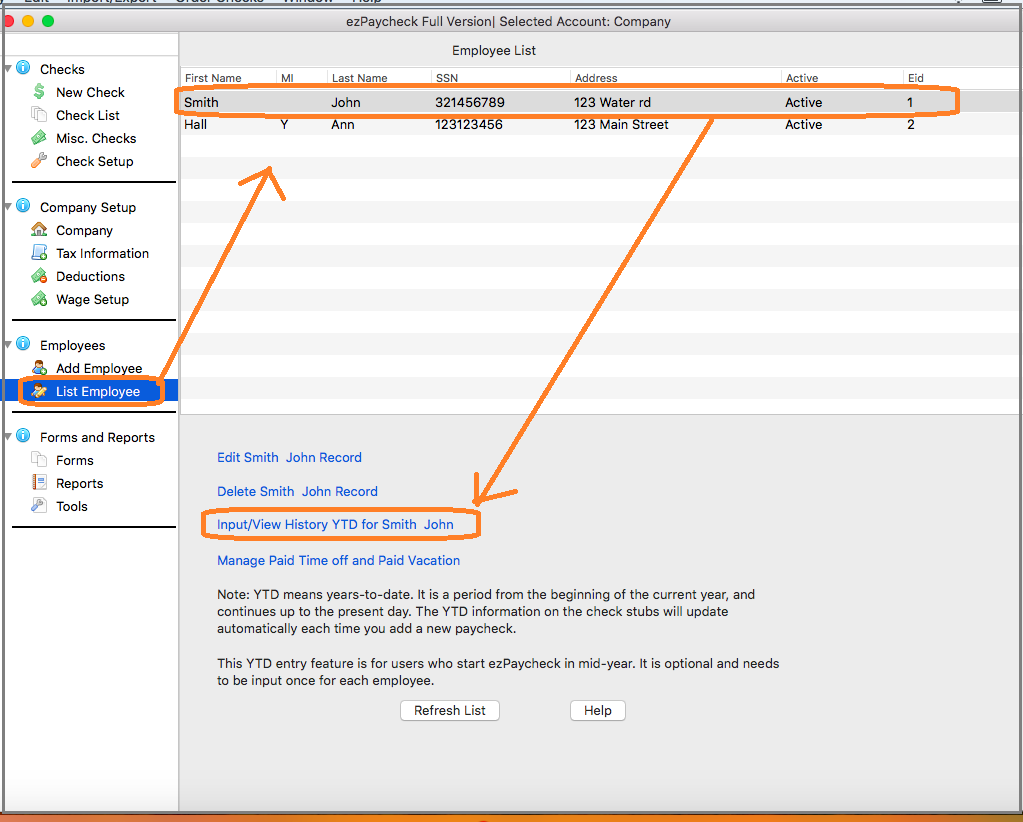
4.1 Navigate to input YTD screen
Start ezPaycheck application, click the left menu "Employees" then click the sub menu "Employee List" to view employee list. Select Ryan from Employee list and open YTD manually input screen.
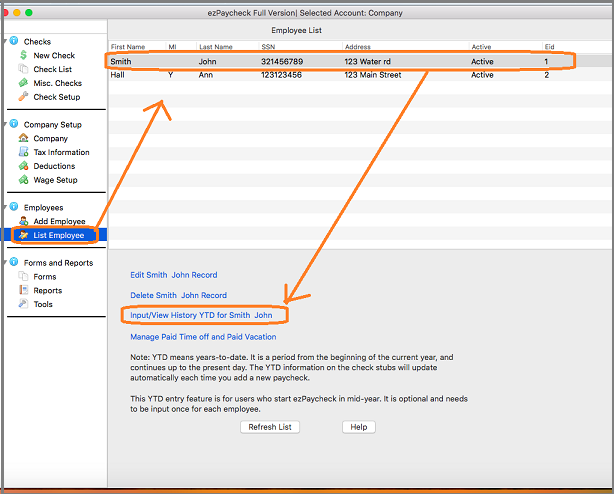
(Click image to enlarge)
4.2 Input YTD data
You can enter the summary information for 1/1/2011 to 6/30/2011 if the first paycheck is from 7/1/20111.
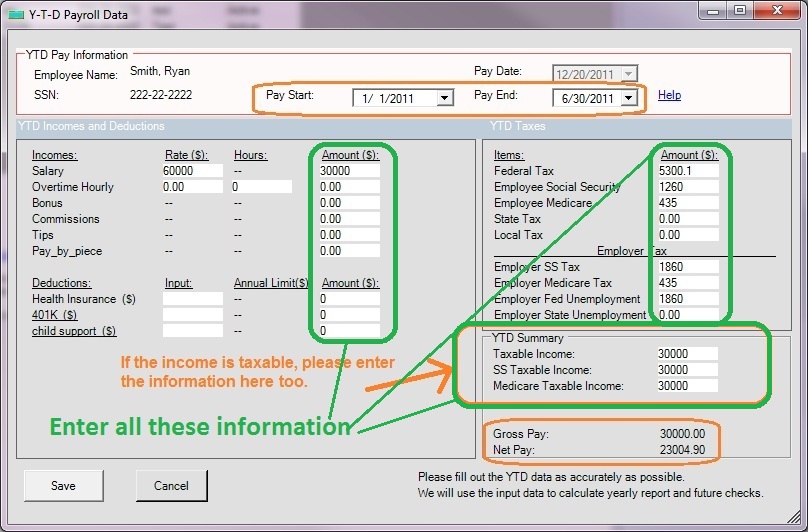
(Click image to enlarge)
4.3 Save information
Click the
SAVE button to update. When you generate the first check (in step 5), you will see the YTD data there
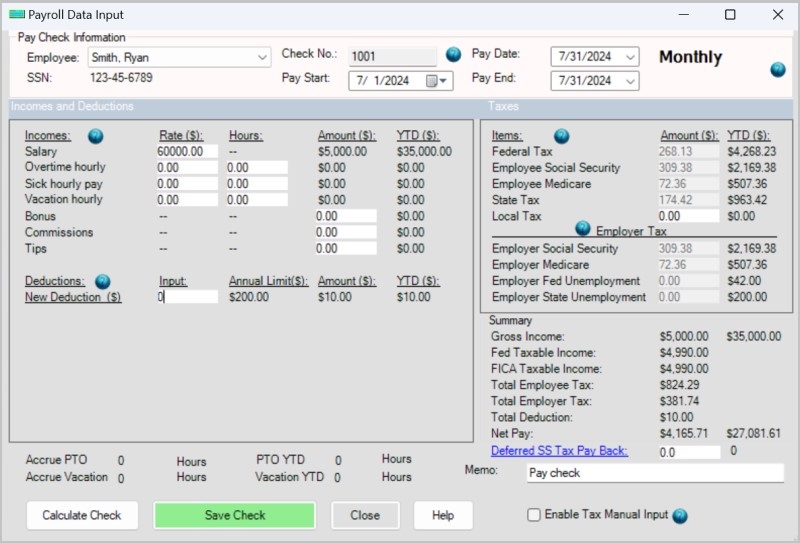
(Click image to enlarge)
<
Previous step: add employees Next Step: add/print checks >