Can I try ezPaycheck for free?
Yes, you are welcome to
download ezPaycheck for free, with no obligations and no need for a credit card. We are glad to assist you if you have any questions.
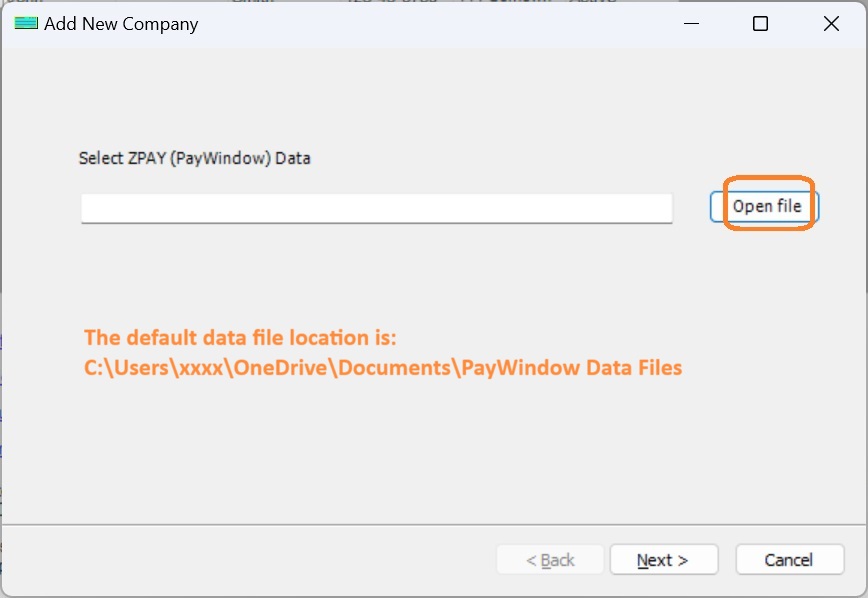
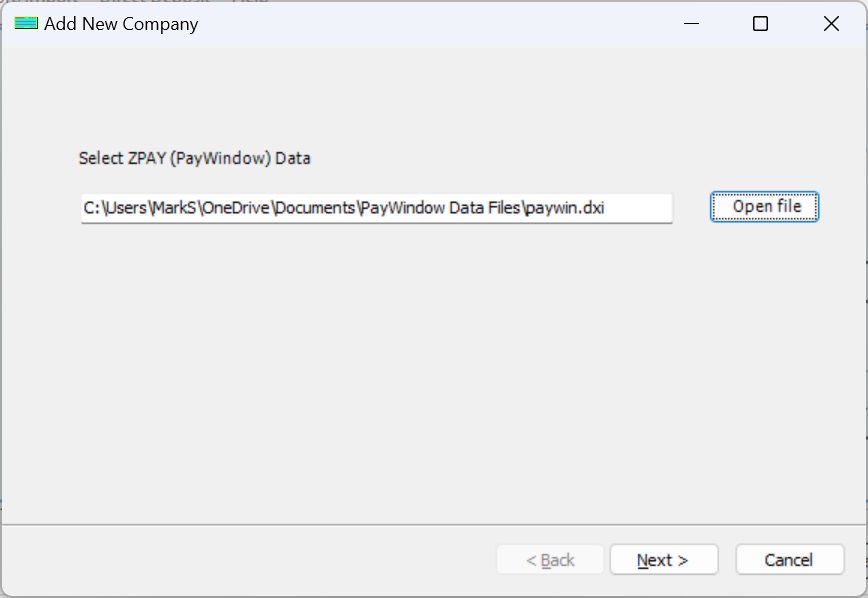
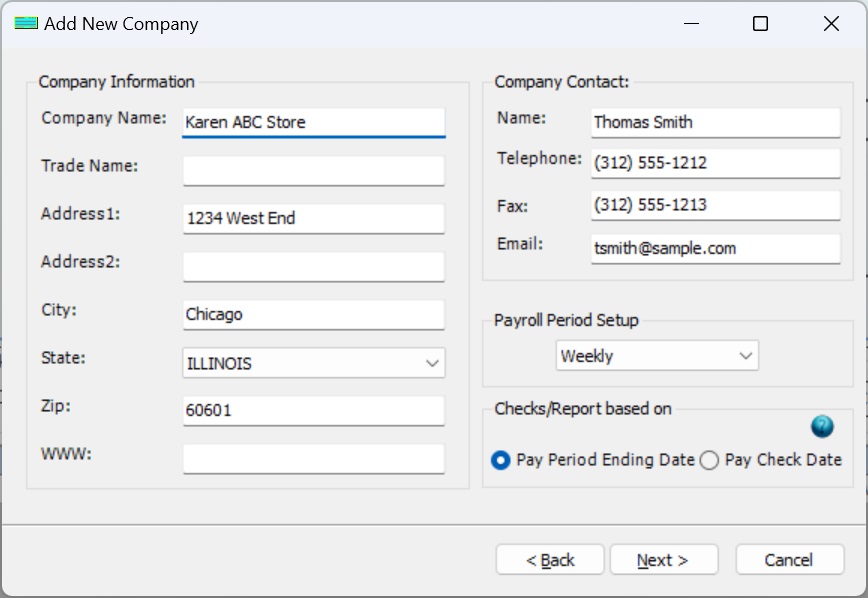
Can I transfer my current zPay data to ezPaycheck easily?
Yes, please follow the steps below to transfer your company and employee data from zPay (PayWindow) to ezPaycheck.
I have installed ezPaycheck 2023 and set up my account, can I transfer the data to ezPaycheck 2024?
Yes. Please follow this guide. All your data will remain.
-
How to update ezPaycheck.
What is the cost of using ezPaycheck? Do I have to purchase both ezPaycheck 2023 and 2024 versions?
No.
Can I update ezPaycheck 2024 for free?
If you purchase ezPaycheck 2024 version, you will get all updates for 2024 edition for free which includes Form 941 update in Feb, Form W2 & W3 update in Oct and Form 940 update in Dec. You can also add more employees or contractors when your business grows bigger with no extra charge.
I have three companies. How many licenses do I need to purchase?
ezPaycheck can support unlimited company accounts on the same computer with no extra charge. Each company account can support up to 500 employees.
- If you will process payroll from the same computer, you just need a single-user license.
- If you will process payroll from 3 different computers, please purchase the 3-user license.
Can ezPaycheck fill in data on my blank checks? I still have many checks left.
Yes, ezPaycheck can print paychecks on both blank stock and pre-printed blank checks. You can customize the check layout if needed.
I have a desktop in the office. I also have a laptop for travel. Can I purchase just one license?
Yes, you can purchase one license. You can easily transfer the license from one computer to the other.
Can I enter the payroll taxes manually?
Yes, you can. Please refer to the guide "
How to enter paychecks for after the fact payroll".
Can I efile W2 forms with ezPaycheck?
ezPaycheck supports the paper form printing feature. If you need to efile W2 forms, please feel free to try our
ezW2 software.
Will ezPaycheck 2024 support the form 943, 941 and 940?
Yes.
I need to efile 1099-nec, 1099-misc forms. Which software should I use?
Our
ez1099 software will work for you. Pleaes feel free to try the free demo version with no obligation.
Does ezPaycheck support the direct deposit feature?
- For federal tax deposit, please follow this guide:
How to make federal tax deposit payment.
- To pay employees to with direct deposit, please use our
ezACH software with ezPaycheck software. We offer the free demo version of ezACH. Please feel free to try with no obligation.
What kind of support do you offer?
We offer free email, chat, and phone support. Additionally, we offer remote support if your company allows us to access your computer remotely. There might be a fee for the remote support. Please feel free to
contact us when you need assistanace.
Download Now >
Buy Now 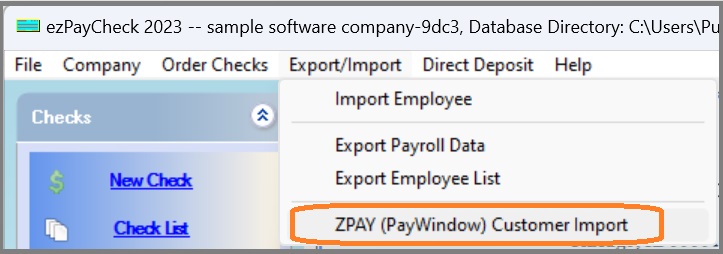

 Need Assistance?