Note: The license codes for different versions are different. For example: if you purchased the previous version 5 for XP computer, you need to purchase the new license to use ezCheckPrinting version 9 on Windows 11.
If you have any question, you can refer to the guides:
Option 1: If you backup data before, you can restore data easily.
Every time you close ezCheckPrinting, a Data Backup reminder will appear. If you can access your previous backup data (the .mdb file), restore your data with ezCheckPrinting. Do not open the .mdb file manually or with other application!
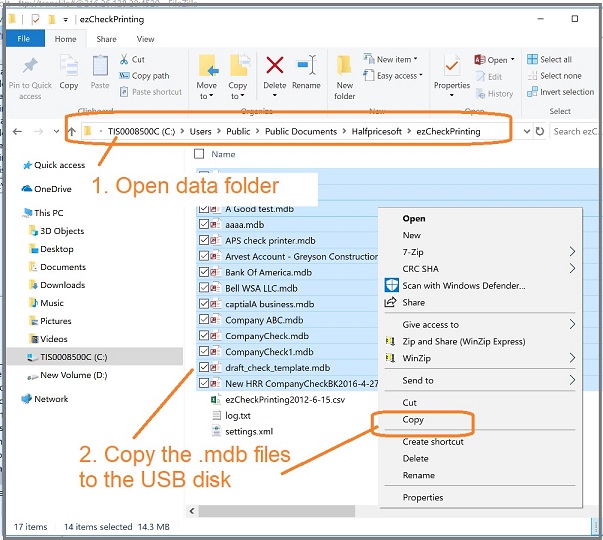
Connect to the hard disk of the old computer and search for the ezCheckPrinting database files.
The database file is .mdb (Microsoft Database) file. You can copy the mdb files to your USB disk
The default data folder is: C:/Users/Public/Documents/Halfpricesoft/ezCheckPrinting
Note: Do not open the database file (.mdb file) manually. You can read the data with ezCheckPrinting.
2.2 Copy the data from USB disk to the data folder on the new computer.
The default data folder is:
C:/Users/Public/Documents/Halfpricesoft/ezCheckPrinting
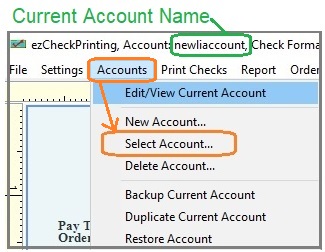
2.3 Switch the current ezCheckPrinting account to view data
Start ezCheckPrinting, click the top menu "Accounts" then "select account". You can should be able to see all the accounts there and switch the current account.
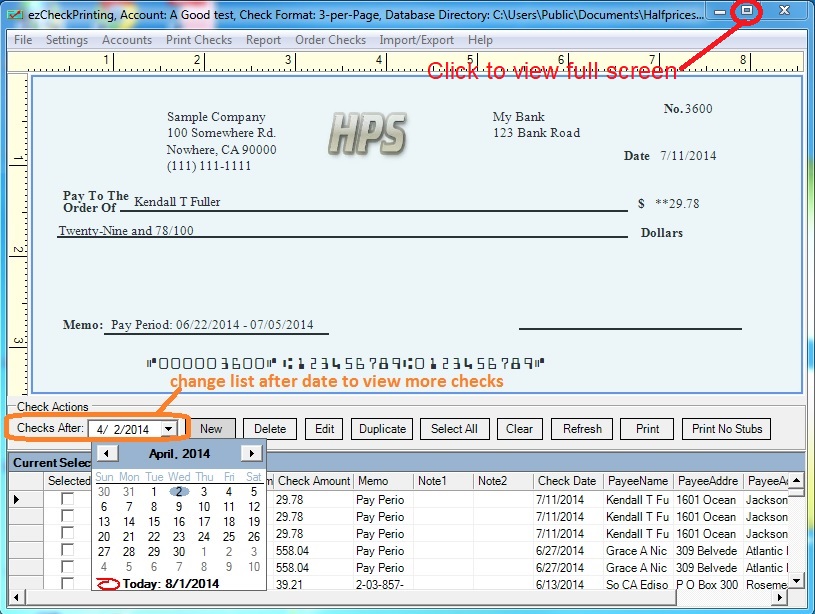
2.4: Change the "Check After" date to view more checks (optional)
ezCheckPrinting for QuickBooks allows QuickBooks users to print checks on blank stock with MICR encoding and logo in house. You can also use it to fill out preprinted blank checks also.
If you have not installed this software, you can download and try it free with no obligation and no credit card needed.
ezCheckPrinting for QuickBooks is compatible with Windows 11, 10, 8.1, 8, 7, Vista, XP and other Windows computers.