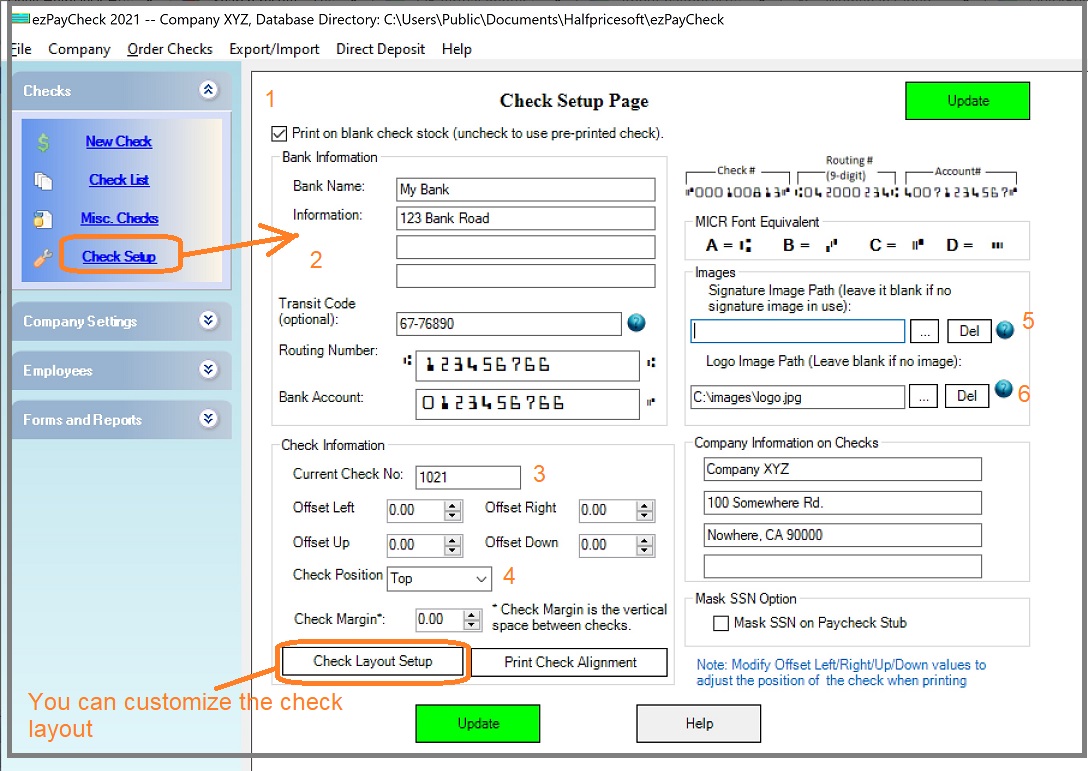
1.1. If you print check on blank check stock, please check the option "Print on blank check stock". Otherwise uncheck this option to use pre-printed check.
1.2. Enter bank account information. If you use pre-printed checks with bank information, you can enter it with dummy data. This information will not print on checks when you use pre-printed checks.
1.3. Enter the check number you want to use for your new paychecks.
1.4. Specify the check format: check-on-top, check-in-middle, check-at-bottom or 3-per-page
1.5. If you want to print paycheck with signature image, you can specify the path here. Otherwise, leave it blank. You can delete current image by highlighting the field and clicking the DELETE button on your keyboard.
1.6. If you want to print paychecks with logo image, you can specify the path here. Otherwise, leave it blank. You can delete current image by highlight the field and click the DELETE button on your keyboard.
1.7. Enter the business name and address displayed on check.
(Click image to enlarge)
